Prep time: 30 minutes
Cook time: 45 minutes
Total time: 1 hour 15 minutes
Servings: 8 servings
Imagine a warm, sunny afternoon, the aroma of freshly baked pastry wafting through your home, and the sweet, juicy scent of ripe strawberries mingling in the air. If you’re picturing a delightful dessert that can brighten any occasion, you’re on the right track with a Mother’s Day Strawberry Tart. This recipe not only brings the flavors of spring to your table but also acts as a wonderful homage to mothers everywhere. Whether you’re aiming to impress your own mother or treating yourself to a well-deserved indulgence, this tart is a celebration of the joy of baking and the sweetness of life.
What makes this strawberry tart special is its delightful combination of textures and flavors. The buttery, flaky crust serves as a perfect base for a luscious pastry cream that is both rich and velvety. Topped with fresh strawberries, each bite offers a burst of freshness that complements the creamy layer beneath. Not only is this tart visually stunning, but it also offers a sense of nostalgia, reminiscent of days spent in the kitchen with family, puttering about while making memories.
In this article, you will learn how to whip up this impressive Mother’s Day Strawberry Tart with ease. I’ll walk you through each step, share tips to make the process smooth, and provide variations to suit any palate. Whether you’re a beginner or an experienced cook, you’ll find this tart both rewarding and straightforward to make.
What Is Mother’s Day Strawberry Tart?
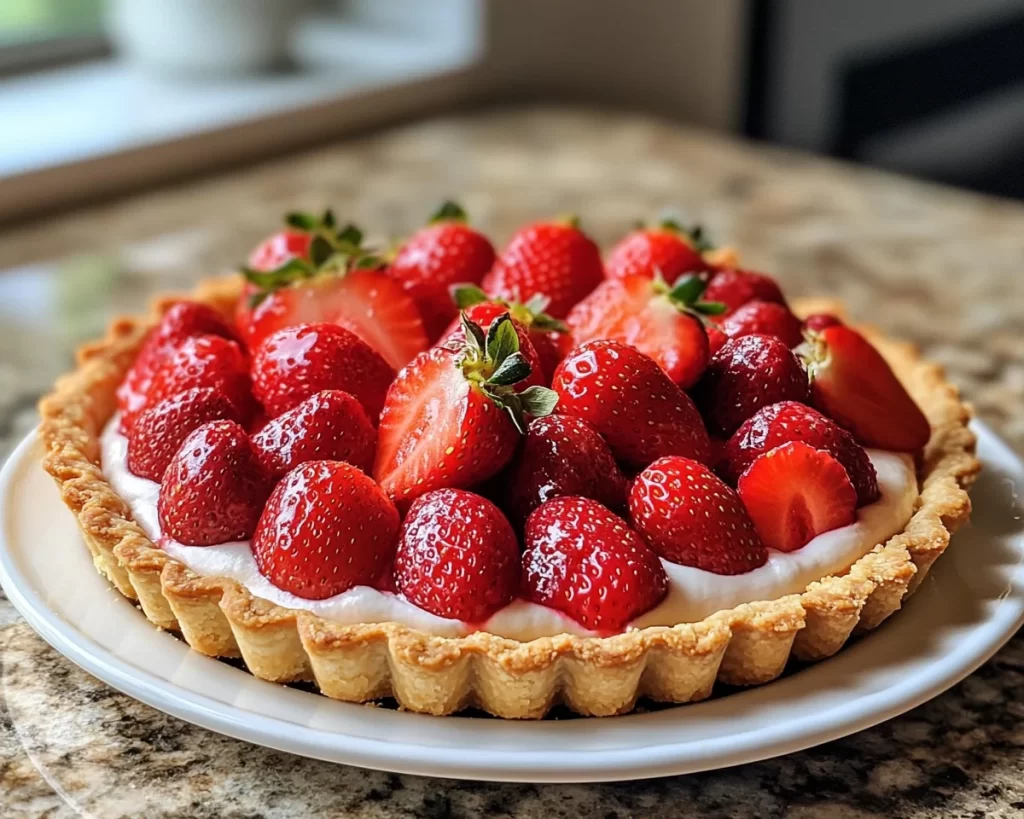
The Mother’s Day Strawberry Tart is a dessert that originates from the classic French pastry tradition. At its heart, this tart consists of a delicate, flaky pie crust filled with creamy pastry cream and topped with beautifully arranged fresh strawberries. This dessert shines not only in taste but also in its presentation, making it perfect for special occasions like Mother’s Day, birthdays, or even a simple family gathering.
When you take a bite of this tart, you will instantly notice the distinct contrast between the crispness of the crust and the richness of the pastry cream. The fresh strawberries add a vibrant pop of flavor and color, making each slice an elegant piece of art. Typically, this tart combines a sweet buttery crust with a silky custard made from eggs, sugar, milk, and cornstarch, all of which come together to create a harmonious balance of flavors. It’s a dessert that captures the essence of spring, with strawberries at their peak flavor, inviting you to enjoy them in every bite.
This recipe encapsulates the joy of baking with your loved ones, an opportunity to create lasting memories in the kitchen. The tart serves as a canvas for your creativity, allowing you to arrange the strawberries in artistic formations, resulting in a strikingly beautiful dessert that is sure to impress.
Why You’ll Love This
There are countless reasons why you’ll fall in love with this Mother’s Day Strawberry Tart. First and foremost, the taste is absolutely divine; it harmoniously balances the creamy, sweet custard with the tangy freshness of ripe strawberries. The buttery crust is the icing on the cake, giving each bite a delightful crunch that contrasts beautifully with the rich filling.
Additionally, this tart is relatively easy to make, even for beginners. With just a handful of ingredients and straightforward steps, you will feel accomplished as you bring this beautiful dessert to life. The satisfaction that comes from creating something artistic and delicious from scratch is unparalleled.
Let’s also highlight the cost-effectiveness of this tart. With strawberries being in season during spring, they are often more affordable. You can create this stunning dessert without breaking the bank. Plus, it’s versatile! You can easily modify the crust or cream to match your dietary needs or preferences, making it a dish that fits into various lifestyles.
It’s essential to address some misconceptions about baking tarts. Many people believe that making a tart from scratch is an arduous task that’s only reserved for seasoned bakers. However, with the right guidance and approach, anyone can tackle this recipe. Remember, the only key ingredient you truly need is a passion for creating something delicious!
Ingredients You’ll Need
To create your Mother’s Day Strawberry Tart, gather the following ingredients:
- All-purpose flour: This serves as the foundation of your crust. It gives structure and a delightful crunch. If you’re looking for a gluten-free alternative, consider using almond or oat flour, though the texture may vary slightly.
- Unsalted butter: Butter enriches the crust, providing flavor and tenderness. Make sure it’s cold and cut into small cubes for the best results when making the dough.
- Granulated sugar: This adds sweetness to your crust and pastry cream. You can substitute it with coconut sugar for a more natural option.
- Milk: Whole milk is recommended for the pastry cream to achieve that luscious texture. If you prefer a dairy-free option, nut milks like almond or cashew can work, keeping in mind that the flavor may slightly change.
- Heavy cream: This will also be used in the pastry cream, ensuring it’s rich and creamy. For a lighter version, you can substitute half-and-half.
- Eggs: Eggs act as a thickening agent in the pastry cream, giving it a silky smooth texture.
- Fresh strawberries: Choose ripe, bright red strawberries for the best flavor. If strawberries are out of season, feel free to use other berries like blueberries or raspberries.
- Vanilla extract: A splash of vanilla elevates the flavors in both the crust and the pastry cream.
Make sure to use fresh, high-quality ingredients, as they greatly influence the final flavor and texture of your tart. Before you start, ensure that your butter is cold and all items are prepped to make the process smoother.
How to Make
Now that you’ve gathered your ingredients, it’s time to dive into the process of making your Mother’s Day Strawberry Tart. Follow these steps for a delightful result:
- Prepare the tart crust: In a large bowl, combine 1 ½ cups of all-purpose flour and ½ cup of granulated sugar. Add ½ cup of cold, unsalted butter (cut into small cubes) to the flour mixture. Using your fingers or a pastry cutter, mix the ingredients until you achieve a crumb-like texture. You should see small bits of butter throughout the flour—that’s what will create the flaky crust! Slowly add 2-3 tablespoons of cold water and mix until the dough holds together. Be careful not to overwork the dough.
- Chill the dough: Shape the dough into a disk, wrap it in plastic wrap, and let it chill in the refrigerator for at least 30 minutes. Chilling the dough allows the gluten to relax, preventing it from shrinking while baking.
- Preheat the oven: While the dough chills, preheat your oven to 375°F (190°C). A hot oven is essential for a properly baked crust. Adding a baking stone or baking sheet in the oven can help maintain consistent temperatures.
- Roll out the dough: Once your dough has chilled, lightly flour your work surface and roll it out to about ¼ inch thickness. Keep moving the dough as you roll to prevent it from sticking to the surface. Transfer the rolled dough to your tart pan. Trim any excess dough and use a fork to poke holes in the bottom to prevent bubbling.
- Bake the crust: Bake your tart shell in the preheated oven for about 20-25 minutes or until golden brown. Keep a close eye to avoid burning. The aroma of baked pastry will fill your kitchen during this time, so enjoy it! Allow the shell to cool completely before filling it.
- Prepare the pastry cream: In a medium saucepan, whisk together 2 cups of whole milk, ½ cup of granulated sugar, and 1 teaspoon of vanilla extract. Heat the mixture over medium heat until it begins to gently simmer. In a separate bowl, whisk together 4 egg yolks and ¼ cup of cornstarch. Once the milk mixture is simmering, slowly pour it into the egg mixture while whisking continuously to prevent curdling. Then, return the mixture to the saucepan and cook over medium heat, stirring constantly, until it thickens and bubbles appear.
- Cool the pastry cream: Once thickened, pour the pastry cream into a bowl and cover it with plastic wrap, ensuring the wrap touches the surface to prevent a skin from forming. Allow it to cool to room temperature, and then refrigerate until ready to use.
- Assemble the tart: Once the crust has cooled and the pastry cream is set, spread the pastry cream evenly over the tart shell. Arrange freshly sliced strawberries artfully on top. Feel free to get creative with your arrangement—this is where you can make your tart truly special!
- Optional glaze and chill: If you want a shiny finish, you can create a simple glaze by heating ¼ cup of apricot jam with a tablespoon of water until melted. Brush this mixture over the strawberries and let the tart chill in the refrigerator for at least 1 hour before serving. The refrigeration allows the flavors to meld and makes it easier to slice.
- Serve and enjoy: Slice your beautiful Mother’s Day Strawberry Tart and serve it chilled. Enjoy the burst of flavors and the creamy texture that complements the fresh strawberries. Watch as your loved ones savor each bite!
As you work through the steps, take a moment to breathe in the beautiful aromas and enjoy the process. Baking is as much about the journey as it is about the destination!
Variations & Substitutions
Gluten-Free Crust: If you’re looking for a gluten-free option, you can easily substitute all-purpose flour with a gluten-free blend. Many stores offer ready-made gluten-free flours that usually have a good mix of various flours and starches. The texture will be slightly different, so keep that in mind, but it will still be delicious.
Dairy-Free Version: For those who are dairy-sensitive or prefer a dairy-free lifestyle, you can substitute heavy cream and milk with almond or coconut cream. This will impart a unique flavor but can create an equally indulgent taste. Do keep in mind that almond milk may work differently than cow’s milk in terms of consistency for the pastry cream, so let it sit for a bit longer on the heat if necessary.
Berry Tart Variation: While strawberries are a classic, consider using a mix of berries, such as blueberries, raspberries, or blackberries. Each offers a different flavor profile and adds to the visual appeal of the tart. Simply layer the mixed berries atop the pastry cream for a colorful, vibrant alternative.
Chocolate Pastry Cream: If you want to add a twist, consider making a chocolate pastry cream instead of the traditional vanilla. Simply melt 4 ounces of high-quality dark chocolate and whisk it into the hot mixture as it thickens. This will provide a rich, decadent flavor that partners beautifully with the strawberries.
Additional Flavoring: You can enhance the flavor of the pastry cream by adding a splash of almond extract instead of vanilla or incorporating a tablespoon of orange zest for a citrusy note. These variations can elevate the flavor to new heights, making the tart uniquely yours.
Common Mistakes to Avoid
When making your Mother’s Day Strawberry Tart, a few common pitfalls can occur. One of the most notable is the crust shrinking while baking, which usually happens when the dough is overworked or not chilled adequately. To prevent this, ensure that you follow the steps for chilling and handle the dough as gently as possible. Remember, less is often more!
Another mistake can arise from improperly cooking the pastry cream. If you rush the cooking process, it may not thicken properly, leading to a runny filling. Ensure to constantly stir and keep an eye on it as it heats up. As soon as it bubbles and coats the back of a spoon, remove it from the heat!
Overstuffing the tart can also lead to problems. While it may be tempting to pile on the strawberries, too many can cause the tart to become soggy. Instead, take your time to arrange the strawberries neatly and consider using fewer berries for a more elegant presentation.
Lastly, be cautious when adding sweeteners to the pastry cream. Always taste as you go. Depending on the ripeness of your strawberries, you may want to adjust the sugar accordingly. Balancing the sweetness is essential to ensure that the natural flavors shine.
Storage, Freezing & Reheating Tips
Your Mother’s Day Strawberry Tart can be stored in the refrigerator for up to three days. However, for best results, it’s recommended to consume it within the first day or two to maintain the crispness of the tart crust. To store the tart, cover it loosely with plastic wrap to prevent it from absorbing any odors from your fridge.
If you have leftovers, simply slice them and place them in an airtight container. Keep in mind that the strawberries will begin to lose their vibrant appearance after a day, so it’s best to enjoy the tart fresh.
Freezing is not recommended for this particular tart, as the custard and fresh strawberries do not thaw well. The texture of the cream can separate, and the strawberries may become mushy—this can lead to a compromised flavor and mouthfeel.
For optimal enjoyment, it is best to prepare the tart on the same day you plan to serve it. If you’re hosting, you can make the tart shell and pastry cream a day ahead, allowing you to slice and arrange the strawberries right before serving.
Frequently Asked Questions
Can I use frozen strawberries?
While fresh strawberries yield the best flavor and texture, you can use frozen strawberries in a pinch. However, they should be thawed and drained thoroughly to remove excess moisture, as this will ensure your tart remains crisp.
How do I know when the pastry cream is ready?
The pastry cream is ready when it thickens and starts to bubble gently. It should coat the back of a spoon. If it’s too thin, continue to cook it for a minute or two while stirring continuously to achieve the right consistency.
Can I make the tart shell in advance?
Yes, you can prepare the tart shell a day ahead of time. Simply bake and cool it completely before covering it with plastic wrap. This makes assembly much easier on the day you plan to serve.
What can I do with leftover pastry cream?
Leftover pastry cream can be stored in the refrigerator for up to three days. It makes a fantastic filling for pastries, éclairs, or even as a topping for pancakes. You can also enjoy it on its own as a delicious dessert!
Is this tart suitable for vegans?
While this specific recipe is not vegan, you can modify it by using a vegan butter substitute for the crust and using plant-based milk and cream. For the pastry cream, you can explore recipes that use cornstarch and coconut milk to achieve a similar texture.
Conclusion:
This Mother’s Day Strawberry Tart is a delightful representation of love, family, and the beauty of spring. With its stunning presentation and harmonious flavors, it’s sure to be a hit at any gathering. Whether you customize the tart for dietary preferences or keep it traditional, this recipe is bound to impress. I encourage you to give it a try, experiment with the variations, and most importantly, enjoy every bite. Don’t forget to share it with your loved ones—after all, desserts are meant to be enjoyed together!