Prep time: 20 minutes
Cook time: 0 minutes
Total time: 4 hours 20 minutes (includes chilling time)
Servings: 8-10
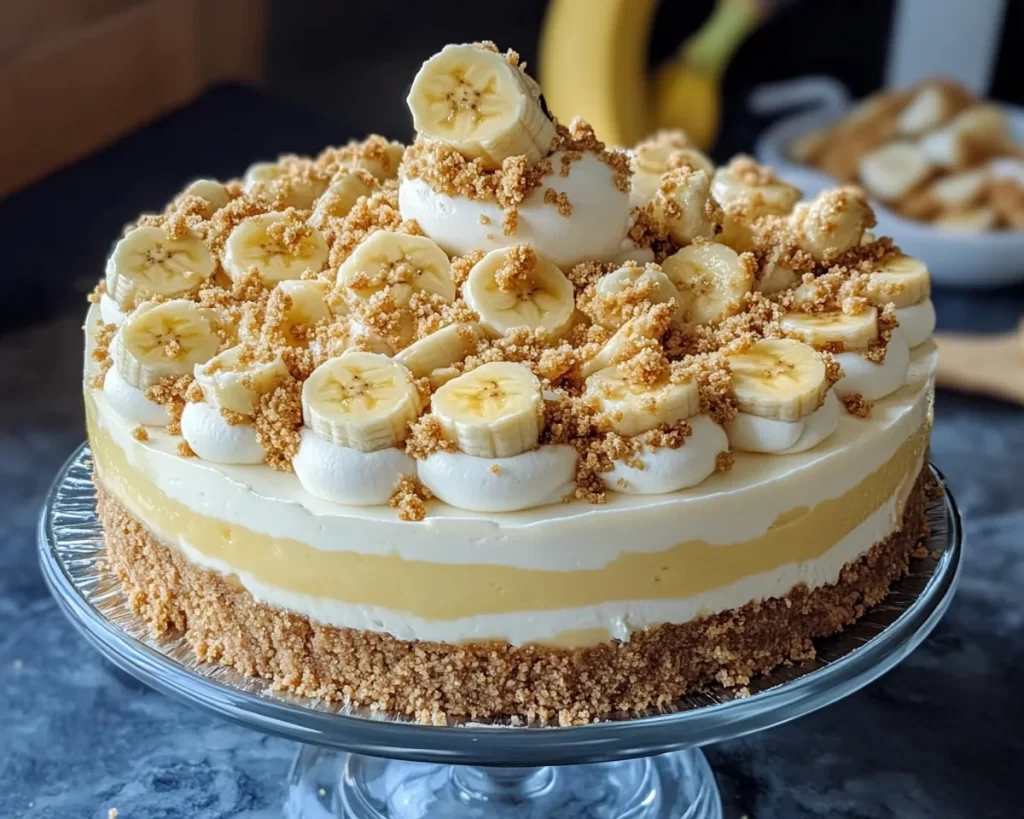
Are you craving a dessert that combines the delightful flavors of banana pudding with the creamy comfort of cheesecake? Look no further than the **Irresistible No-Bake Banana Pudding Crunch Cheesecake**. This luscious dessert captures the essence of classic banana pudding while introducing a whole new textural experience. Its creamy base, combined with crunchy layers of cookies and fresh banana slices, will surely tantalize your taste buds. Whether you’re looking for a treat for a family gathering or simply want to indulge yourself, this cheesecake will not disappoint.
What makes this recipe stand out is its **no-bake** simplicity, requiring minimal effort while delivering maximum flavor. You won’t need to stress about oven temperatures or baking times. Instead, you’ll be delighted to find that all it takes is a little mixing and refrigeration to create a show-stopping dessert. In the following sections, I’ll guide you through the steps to make this delightful cheesecake, share important tips along the way, and suggest irresistible variations to suit your taste.
What Is Irresistible No-Bake Banana Pudding Crunch Cheesecake?
The **Irresistible No-Bake Banana Pudding Crunch Cheesecake** is a delightful fusion of two beloved desserts: banana pudding and cheesecake. Originating in American kitchens, this confection has captured hearts with its creamy, rich filling and light, airy texture. The no-bake aspect allows the flavors to meld beautifully without the constraints of traditional baking.
At its core, this cheesecake features a smooth, **vanilla-flavored** cream cheese filling enhanced with ripe, mashed bananas. The flavor profile is complemented by layers of crunchy **Nilla wafers** or graham crackers, providing a satisfying contrast to the creamy layers. You can expect a rich, sweet flavor that evokes nostalgia, perhaps reminding you of warm family gatherings and summer picnics. The bananas not only add sweetness but also contribute to the overall creaminess, making every bite melt in your mouth.
With each forkful, you encounter the delightful interplay of textures—creamy, smooth filling, soft banana slices, and the **crunchy** cookie base. The dish is chilled to perfection, making it an ideal dessert for warm weather or any occasion calling for celebration. The ease of preparation combined with the rich flavors makes it a must-try recipe in your culinary repertoire.
Why You’ll Love This
There are numerous reasons why you’ll fall head over heels for this cheesecake. First and foremost, the taste is simply heavenly, marrying sweet bananas with creamy cheesecake. The **addition of cookies** in the mix elevates it to a new level, creating a dish that not only looks impressive but also satisfies even the toughest critics.
From a practical standpoint, this recipe is incredibly easy to prepare. With minimal cooking skills required, even busy parents or beginners in the kitchen can tackle this dessert with confidence. The total preparation time is a mere 20 minutes, followed by a chilling time of only four hours, making it a convenient option for last-minute gatherings.
Cost-wise, this cheesecake is very budget-friendly. The ingredients are easily accessible, and you likely have many of them already in your pantry. Plus, with its no-bake nature, you save on energy costs typically associated with baking. It’s perfect for **meal prep**, as it can be made ahead of time and stored in the refrigerator, allowing you to focus on other dishes for your gathering.
It’s worth noting that this cheesecake can easily adapt to various dietary needs. If you have guests who prefer gluten-free options, simply replace the cookies with a gluten-free variety. With its versatility and rich flavor, this dessert is the perfect choice for any occasion.
Ingredients You’ll Need
- 8 ounces cream cheese: Helps create a rich, creamy base. Be sure to let it come to room temperature for easier mixing.
- 1 cup whipped topping: Adds lightness and a fluffy texture, balancing the density of the cream cheese.
- 1 cup mashed ripe bananas: Enhances sweetness and contributes to the cheesecake’s creamy texture. Use overripe bananas for the best flavor.
- ½ cup powdered sugar: Sweetens the mixture and adds a fine texture. You can reduce this if you prefer less sweetness.
- 1 teaspoon vanilla extract: Imparts a well-rounded flavor that complements the bananas and cream cheese.
- 2 cups Nilla wafers or graham crackers: Forms the crunchy crust. Nilla wafers are traditional and impart a delightful flavor, while graham crackers offer a slightly different taste.
- 2-3 medium bananas: Sliced for layering within the cheesecake and as a topping.
- Optional garnish: Additional whipped topping and banana slices for decoration.
This straightforward list of ingredients provides everything you need to create the **Irresistible No-Bake Banana Pudding Crunch Cheesecake**. Each component plays a crucial role, from the foundational cream cheese to the joyful banana layers and delicious cookie crust. Feel free to experiment with substitutes, but do keep the balance of flavors in mind for the best result.
How to Make
Follow these easy steps to craft your very own **Irresistible No-Bake Banana Pudding Crunch Cheesecake**:
- Start by preparing your crust. In a large mixing bowl, crush the Nilla wafers or graham crackers into fine crumbs. This can be done using a food processor or by placing the cookies in a zip-top bag and crushing them with a rolling pin. Once you have fine crumbs, pour them into a bowl and mix in melted butter. The combination should resemble wet sand that holds together when pressed.
- Press the crumb mixture firmly into the bottom of a 9-inch springform pan. Use a flat-bottomed glass or measuring cup to press it down evenly, ensuring a solid base for the cheesecake. Chill the crust in the refrigerator for about 15 minutes while you prepare the filling.
- In another mixing bowl, beat the room-temperature cream cheese with an electric mixer until it becomes smooth and creamy. This step is crucial, as it helps avoid lumps in your cheesecake. Gradually add in the powdered sugar, continuing to mix until fully incorporated. You want a silky texture without any graininess.
- Next, gently fold in the mashed ripe bananas and vanilla extract. This will infuse the filling with delicious banana flavor. Make sure not to overmix, as you want to retain the airy texture. Stir in the whipped topping until it is just combined. Aim for a light and fluffy batter at this point.
- Retrieve the crust from the refrigerator. Layer half of the banana slices over the crust, followed by half of the filling mixture. Spread it evenly, gently smoothing the top with a spatula. Repeat this layer with the remaining bananas and topping. Finish by spreading the last layer of filling over the top to create a beautiful finish.
- Cover the cheesecake with plastic wrap or a lid, and refrigerate for at least four hours, or preferably overnight. This allows the flavors to meld beautifully, resulting in a rich and satisfying dessert. The chilling process is key, ensuring the cheesecake sets up properly and is easy to slice.
- When ready to serve, carefully remove the springform pan sides. Slice the cheesecake into wedges, and if desired, add a dollop of whipped topping and additional banana slices on top for presentation. You’ll be amazed at how well the flavors come together, creating a delightful experience.
Each step is crafted to ensure your cheesecake turns out perfectly. The combination of mixing techniques and cooling times allows the ingredients to reach their full potential. Don’t skip the chilling step; it’s essential for achieving that perfect cheesecake consistency!
Variations & Substitutions
Chocolate Banana Crunch Cheesecake: If you’re a fan of chocolate, consider adding cocoa powder or melted chocolate to the filling. This adds a lovely depth of flavor that compliments the bananas beautifully. For extra texture, fold in some mini chocolate chips for a delightful surprise in every bite.
Peanut Butter Banana Crunch Cheesecake: For a creamy twist, add peanut butter to your filling. The nutty flavor pairs excellently with the bananas and adds substantial richness. You can replace a portion of the cream cheese with creamy peanut butter, which adds a delightful element while still maintaining the structure of the cheesecake. Make sure to top with chopped peanuts for some added crunch.
Vegan Banana Pudding Crunch Cheesecake: For a vegan-friendly version, substitute the cream cheese with a plant-based alternative and the whipped topping with a coconut cream or tofu blend. Use vegan cookies to construct the crust. This option allows you to enjoy the same rich flavors while adhering to a plant-based diet.
Gluten-Free Banana Pudding Crunch Cheesecake: To cater to gluten-free needs, simply opt for gluten-free cookies instead of traditional graham crackers. This minor adjustment ensures everyone can enjoy this delicious dessert without feeling left out.
Nut-Free Banana Pudding Crunch Cheesecake: For individuals with nut allergies, this dessert is naturally nut-free unless you add peanut butter or other nuts. If you wish to keep it nut-free, stick to the original recipe and enjoy the delightful banana and cookie flavors.
Each of these variations allows you to customize the cheesecake to fit your taste preferences or dietary needs, ensuring that this recipe remains a versatile staple in your collection.
Common Mistakes to Avoid
When preparing the **Irresistible No-Bake Banana Pudding Crunch Cheesecake**, it’s easy to make a few common mistakes that can affect the outcome.
First, don’t rush the chilling process. Skipping or shortening the chilling time can lead to a cheesecake that doesn’t set properly, resulting in a soggy texture. Always allow it to chill for a minimum of four hours to ensure it holds its shape when sliced.
Another mistake to avoid is not using room-temperature cream cheese. Starting with cold cream cheese can create lumps in the filling, which compromises the smooth texture you want in a cheesecake. Leave the cream cheese out for about an hour before you begin preparing the recipe.
Additionally, resist the temptation to add too many bananas. Though they are a key flavor, using excessive banana can create a filling that’s too wet, resulting in a less-than-ideal consistency. Stick to the suggested amount, and make sure they’re ripe for maximum flavor.
Finally, be cautious with the whipped topping. When you fold it into the filling, ensure you do so gently to maintain airiness. Overmixing at this stage can lead to a denser cheesecake, straying from the light, fluffy texture that makes this dessert so enjoyable.
Storage, Freezing & Reheating Tips
Storing your **Irresistible No-Bake Banana Pudding Crunch Cheesecake** properly will ensure its freshness. Keep leftovers in the refrigerator, tightly covered. It can be stored for up to five days, but keep in mind that the bananas may begin to brown as they continue to sit, affecting the visual appeal.
If you want to prepare this dessert ahead of time, consider freezing it. While the texture may slightly change after freezing, it retains its delightful flavors. To freeze, wrap the cheesecake tightly in plastic wrap and then in aluminum foil for optimal preservation. When you’re ready to enjoy it, allow it to thaw in the refrigerator overnight rather than at room temperature, keeping it safe from bacteria growth.
Reheating isn’t typically necessary, as this is served chilled. However, if you do wish to enjoy a slightly warmer dessert, consider slicing a piece and allowing it to sit at room temperature for about 15-20 minutes before serving. Avoid using the microwave, as it may disrupt the texture.
Always ensure you follow food safety best practices, particularly when handling dairy and fruit. Keep an eye on the expiration dates of your ingredients, especially the cream cheese and whipped topping, to make certain your cheesecake remains safe and delicious.
Frequently Asked Questions
Can I make this cheesecake ahead of time? Yes! In fact, this cheesecake tastes even better when allowed to chill overnight. You can prepare it up to two days in advance, making it an excellent option for gatherings or parties. Just be sure to keep it covered in the refrigerator.
Can I use frozen bananas for this recipe? While fresh, ripe bananas yield the best flavor and texture, you can use frozen bananas in a pinch. Just make sure to thaw them fully and drain any excess liquid before mashing. This will help maintain the consistency of the cheesecake.
How can I prevent the bananas from browning on the cheesecake? To slow the browning process, mix a tablespoon of lemon juice into the banana slices before layering them. This not only helps preserve their color but also adds an interesting zing to the flavor.
Can I substitute the whipped topping? Absolutely! If you prefer homemade whipped cream, you can replace the prepared whipped topping with one cup of heavy cream whipped to soft peaks. This will give a fresher flavor, and you can sweeten it to taste with sugar.
Is it necessary to use a springform pan? While a springform pan helps create a clean and beautiful presentation, it’s not absolutely necessary. You can use a regular pie pan, but note that it will be more challenging to serve without the sides that come away easily. If using a standard pan, make sure to line it with parchment paper for easier removal.
Conclusion:
The **Irresistible No-Bake Banana Pudding Crunch Cheesecake** stands out as a delightful dessert that brings together the best of both worlds. Its creamy texture, banana flavor, and crunchy layers come together in a way that’s sure to impress. By following the steps outlined here and keeping in mind some handy tips, you can create a dessert your family and friends will rave about. Don’t hesitate to experiment with variations or customize it to your taste. Give this recipe a try and share your experience with others—your next dessert could become a family favorite!