Prep time: 30 minutes
Cook time: 1 hour
Total time: 1 hour 30 minutes
Servings: 24 bonbons
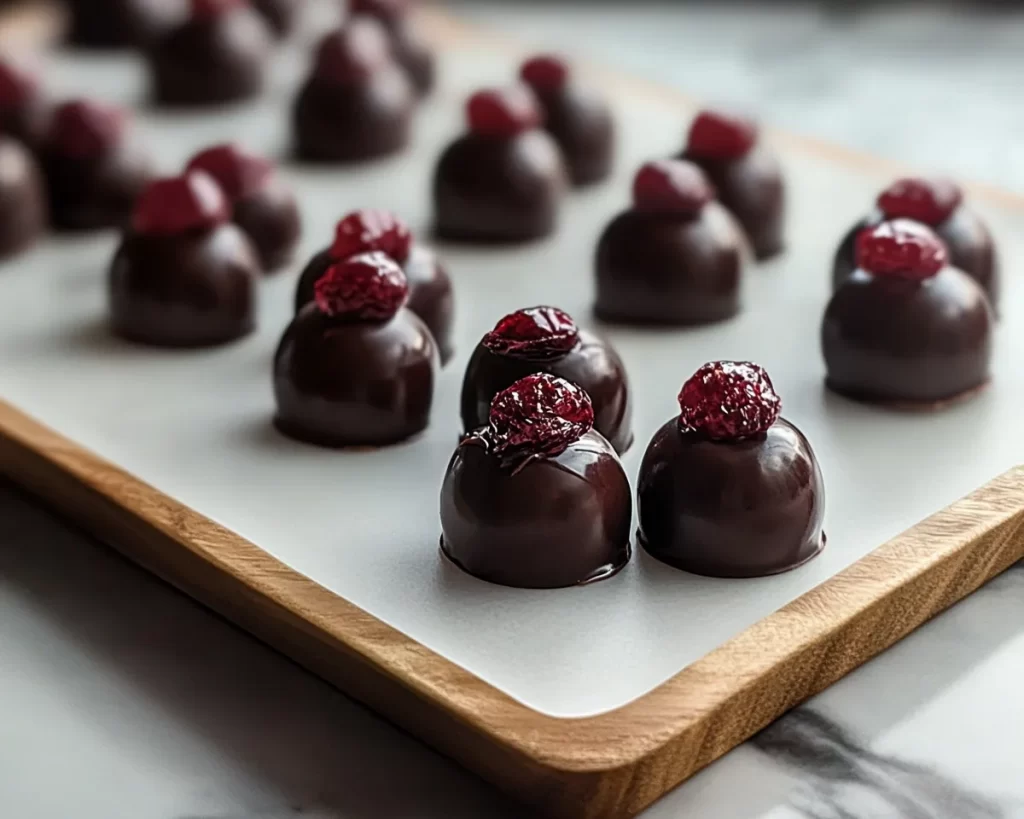
Indulgence has a new name, and it’s the **Decadent Cherry Chocolate Bonbons Recipe**. Imagine sinking your teeth into a silky chocolate shell that effortlessly gives way to a luscious cherry filling. This delightful confection brings together the best of both worlds—sweetness and a touch of tartness—creating a unique treat that’s perfect for any occasion. Whether you are hoping to impress your friends at a dinner party, indulge your family during the holidays, or simply enjoy a moment of self-care with a sweet treat, these bonbons are sure to elevate your dessert game.
In this article, you’ll discover not just how to create these exquisite bonbons, but also what makes them so special. You’ll learn about the ingredients that contribute to their amazing flavor and texture, how easy they are to prepare—even if you’re a beginner in the kitchen—and various adaptations that suit different dietary requirements. So get ready to whip up something truly mouthwatering!
What Is Decadent Cherry Chocolate Bonbons Recipe?
The **Decadent Cherry Chocolate Bonbons** are a gourmet dessert that beautifully blends a rich chocolate exterior with a creamy cherry center. Originating from European confectionery traditions, bonbons have long been celebrated for their elegance and captivating flavors. These bite-sized delights are a true feast for the senses, not only looking sophisticated but also offering a tantalizing combination of tastes that dance on your palate.
The magic begins with a smooth, velvety chocolate casing that is rich without being overwhelmingly sweet. As you bite into the shell, you’re greeted by a burst of flavor from the cherry filling, which typically consists of cherry puree combined with cream or chocolate. The contrast of textures—from the hard shell to the soft filling—elevates your experience, making each bite a delightful adventure. In addition to being simple to create, they can be customized depending on your flavor preferences and dietary needs.
Why You’ll Love This
There are countless reasons to fall in love with this recipe, starting from its taste. The balance of sweet and tart flavors makes these bonbons a standout choice for any occasion. In addition to being delicious, the **Decadent Cherry Chocolate Bonbons** are impressively easy to make, even for beginners. You don’t need to be a professional chocolatier to master this recipe; the instructions are straightforward and easy to follow.
Moreover, creating these bonbons is cost-effective compared to store-bought options, meaning your sweet tooth can be catered to without breaking the bank. They are also incredibly versatile. Want to make them vegan? Use dairy-free chocolate and coconut cream. Have a nut allergy in the family? Skip the nuts in your cherry filling for a safe version. The ability to adapt the recipe to meet various dietary preferences makes it a practical choice for households with mixed diets.
Additionally, common misconceptions about homemade chocolates often leave some cooks feeling hesitant. You might think that creating bonbons is reserved for special occasions or that it requires special equipment. In reality, with minimal tools and some patience, you can make these gorgeous treats in your own kitchen.
Ingredients You’ll Need
To make your **Decadent Cherry Chocolate Bonbons**, gather the following ingredients:
- Dark chocolate: This will be your primary coating. Choose a high-quality chocolate (70% cocoa or higher) for a rich flavor. If you prefer milk chocolate or white chocolate, feel free to substitute.
- Fresh or frozen cherries: The stars of the filling. Fresh cherries are ideal when in season, but frozen cherries work perfectly as well. Just ensure they are pitted.
- Heavy cream: This adds a luxurious mouthfeel to your cherry filling. You can substitute with coconut cream for a dairy-free option.
- Powdered sugar: This sweetens and thickens your filling without making it grainy.
- Butter: Adds richness to the chocolate coating. You can also use coconut oil for a dairy-free alternative.
- Vanilla extract: Enhances the overall flavor profile of the bonbons, making them taste even more delightful.
Each ingredient plays a critical role in achieving the perfect balance of flavors and textures. The combination of chocolate and cherries is not only classic but also tantalizing, promising an unforgettable experience—one that you will find yourself craving again and again.
How to Make
Creating your **Decadent Cherry Chocolate Bonbons** involves a series of simple steps that will lead you to a gourmet finish.
- Start by preparing your cherry filling. In a saucepan over medium heat, combine the pitted cherries, heavy cream, and powdered sugar. Stir continuously until the mixture starts to thicken, about 5-7 minutes. This will create a rich cherry mixture that’s bursting with flavor. Once done, remove it from the heat and let it cool completely.
- While your cherry filling is cooling, prepare your chocolate coating. Chop the dark chocolate into small pieces and place them in a heatproof bowl over a pot of simmering water (double boiler method) or microwave in 15-second intervals, stirring until melted and smooth. Add a tablespoon of butter or coconut oil to the chocolate; this will give it a beautiful sheen and glossy finish once cooled.
- Once both the filling and coating are ready, it’s time to combine them. Using a small mold (silicone molds work great for this), spoon a layer of melted chocolate into the bottom of each cavity to form the base of your bonbons. Ensure each cavity is well-coated. Set the mold in the refrigerator for about 10-15 minutes until the chocolate has firmed up.
- After the base has set, add a dollop of the cherry filling into each chocolate cavity, leaving some space at the top for the final chocolate layer. This helps ensure your bonbons maintain their shape and are easy to eat. Once you’ve filled each cavity, top it off with more melted chocolate, sealing the cherry filling inside. Use a spatula to smooth everything out.
- Place the molds back in the refrigerator to allow the bonbons to fully set, approximately 30-45 minutes. You’ll know they are ready when they feel firm to the touch. If you’re in a rush, you can also put them in the freezer for about 15 minutes.
- Once set, carefully remove the bonbons from the molds. If they seem stuck, gently flex the mold to release them without damaging the chocolates. At this point, you can dust them with cocoa powder or sprinkle some sea salt on top for an added touch if you wish.
With just a little patience and these steps, you’ll have created an exquisite treat that looks as good as it tastes!
Variations & Substitutions
Vegan Cherry Chocolate Bonbons: If you’re looking for a vegan-friendly version, substitute dairy chocolate with a high-quality dairy-free chocolate. Also, replace the heavy cream with coconut cream for that rich texture you want. This variation isn’t just for those on a vegan diet; it’s also a great way to enjoy a lighter dessert without compromising flavor.
Nutty Cherry Bonbons: For added crunch, you can fold in finely chopped nuts (such as almonds or hazelnuts) into the cherry filling. This variation works wonderfully for those who enjoy a bit of crunch in their bonbons. The nuts will not only provide texture but also an additional layer of flavor that complements the cherries beautifully.
Spiced Cherry Chocolate Bonbons: To elevate the flavor profile, consider adding some spices to your cherry filling. A pinch of cinnamon or a splash of almond extract can transform the taste experience entirely. This variation adds a warmth that turns your sweet treat into a comforting indulgence.
Alcohol-Infused Cherry Bonbons: For a more adult version, try soaking your cherries in some cherry liqueur, like Kirsch, before mixing them into your filling. This enhances the flavor and adds a delightful kick. Be sure to adjust the sugar content accordingly to balance the added sweetness from the liqueur.
Dark Chocolate Raspberry Bonbons: If you want to switch things up, you can use raspberries instead of cherries. This variation is fantastic for those who enjoy a bolder berry flavor. The process remains the same, and you’ll be pleased to discover how the tartness of raspberries brings a different dynamic to your bonbon experience.
Common Mistakes to Avoid
Making **Decadent Cherry Chocolate Bonbons** can be simple, but there are common pitfalls even experienced cooks might encounter. One of the most significant issues is using chocolate that is not of good quality. Cheap chocolate can result in a waxy texture and an unappetizing flavor. Always choose a chocolate you enjoy eating on its own.
Another mistake is not allowing your layers to cool adequately. Rushing this step can lead to a mix-up of filling and coating, making your bonbons look less appealing. Remember that patience is key here; let each layer set completely before moving to the next step.
Additionally, if your bonbons are not releasing from their molds properly, a possible cause could be that your chocolate layer is too thick or not well-coated. Ensure that each cavity is evenly filled and allow enough time for the chocolate to set.
Lastly, if you’re using frozen cherries, ensure they are properly drained before use. Too much liquid can affect your filling’s texture and make it too runny. Strain your cherries well, and you’ll be rewarded with bonbons that are perfectly balanced.
Storage, Freezing & Reheating Tips
To ensure your **Decadent Cherry Chocolate Bonbons** stay fresh and delicious, proper storage is essential. Store them in an airtight container at room temperature for up to a week. A cool, dry place is ideal, away from direct sunlight or heat sources. If your environment is particularly warm, consider refrigerating them, but this might affect the texture slightly.
For longer storage, you can freeze the bonbons. Place them in a single layer on a baking sheet to freeze them for an hour before transferring them to an airtight container. They can last for 2-3 months in the freezer. When you want to enjoy them, simply thaw them in the refrigerator overnight. Make sure to avoid microwaving them, as this could change the texture of the chocolate and filling.
In terms of food safety, be cautious of any signs of spoilage, especially if using fresh ingredients. If the bonbons start to look or smell off, it’s best to discard them. Always use clean utensils when handling the bonbons to avoid cross-contamination.
Frequently Asked Questions
Can I use milk chocolate instead of dark chocolate for the bonbons?
Yes, you can definitely use milk chocolate if that’s your preference! However, be aware that milk chocolate is typically sweeter and less intense in flavor compared to dark chocolate. This means your bonbons will have a different taste profile, leaning more towards sweetness. Feel free to taste your mixture along the way to adjust the sweetness to your liking.
How do I know when the bonbons are set?
The bonbons are ready when they feel firm to the touch and easily come out of the molds. Patience is key; they typically need at least 30-45 minutes in the refrigerator to fully set. If they are still soft, give them a little longer. You can also gently flex the molds to see if the bonbons pop out easily.
Can I make these bonbons ahead of time?
Absolutely! The bonbons can be made in advance and stored properly. They stay delicious for up to a week at room temperature or can be frozen for several months. That said, if you’re preparing them for an event, making them a day ahead allows the flavors to meld beautifully.
Can I use other fruits instead of cherries?
Certainly! While cherries are a classic choice, you can experiment with different fruits, such as raspberries, strawberries, or even mango. Just ensure that your fruit is appropriately prepared and that you’re adjusting the sugar content based on their natural sweetness levels. Each fruit will impart a unique taste and color, allowing for endless creative possibilities.
What equipment do I need to make these bonbons?
The beauty of making **Decadent Cherry Chocolate Bonbons** is that you don’t need a lot of specialized equipment. A saucepan, mixing bowls, and a silicone mold are essential. However, a double boiler makes melting the chocolate easier, ensuring you don’t burn it. If you don’t have one, a microwave or a heatproof bowl over hot water will work just fine!
Conclusion:
The **Decadent Cherry Chocolate Bonbons Recipe** combines rich flavors and satisfying textures, making it a delightful treat for any occasion. From their elegant presentation to their irresistible taste, these bonbons are not only fun to make but also a guaranteed hit among friends and family. I encourage you to try your hand at this recipe, customize it as you like, and embrace creativity in the kitchen. Share your creations with loved ones and watch their eyes light up with joy!