Prep time: 15 minutes
Cook time: 10 minutes
Total time: 25 minutes
Servings: 24 cookies
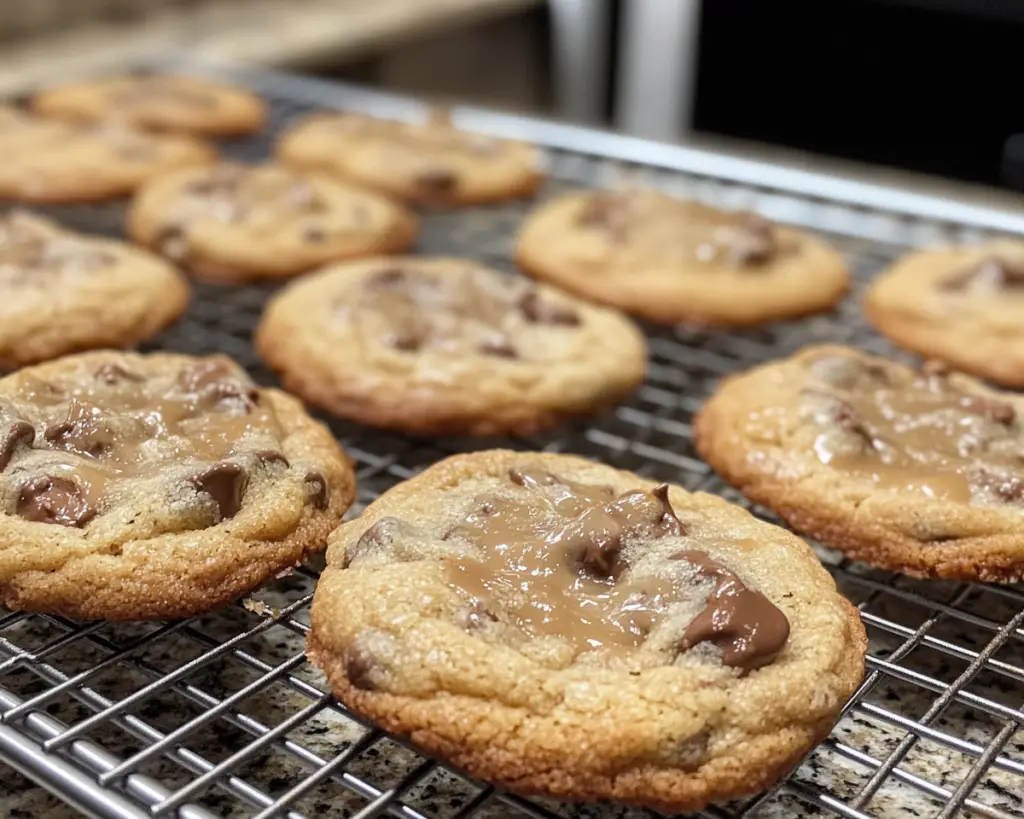
Imagine taking a bite of a golden-brown cookie that gives you that delightful **chewy** texture, melting in your mouth as the rich flavors dance on your palate. Yet, there’s a snag in your plans. Your homemade **caramel cookies** seem to lack that perfect chewiness you long for. This recipe will unravel the secret of achieving those dreamy cookies—soft, chewy, and bursting with caramel goodness.
What makes this recipe truly special is not just the **delicious flavor** but also the **easy-to-follow steps** that work for both seasoned bakers and novices alike. We will explore the finest ingredients, step-by-step instructions, and common pitfalls to avoid. By the end of this article, you’ll have an arsenal of tips and tricks to perfect your cookie game.
What Is Why Are Your Caramel Cookies Missing That Perfect Chewiness?
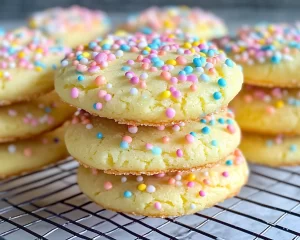
Caramel cookies are a delightful treat, characterized by their **soft, chewy texture** and rich, buttery flavor. Originating as a part of a love affair with caramel, this cookie embodies the best of both worlds: the slight crunch of the exterior contrasts beautifully with the gooey, tender interior. The caramel flavor melds perfectly with the buttery cookie dough, creating a symphony of taste that’s hard to resist.
When making these cookies, you may find that achieving that elusive **chewy texture** becomes a challenge. Many home bakers encounter difficulties with consistency, resulting in cookies that are either too hard or crumbly. Understanding the role of each ingredient and the **baking process** is essential to troubleshoot and perfect your creation.
The allure of caramel cookies lies not just in their taste but in the moments they create—whether it’s enjoying them on a quiet afternoon or sharing them with loved ones during special occasions. Understanding the reasons your cookies may not be achieving the texture you desire will enhance your skills, ensuring that you can reproduce that warm, gooey delight time and time again.
Why You’ll Love This
There are countless reasons to whip up a batch of caramel cookies, and they extend far beyond their delicious taste. These cookies are wonderfully **versatile**, serving as a delightful companion to a cup of coffee during your morning routine or as a decadent dessert after dinner. They are not only easy to make, but they are also budget-friendly, requiring minimal ingredients that you may already have in your pantry.
One common misconception about baking cookies is that achieving a great texture requires intricate techniques or expensive tools. In truth, a little knowledge about the right ingredient proportions and methods can lead you to success. The golden rule of thumb is to maintain the right balance between wet and dry ingredients, ensuring that your cookies retain that coveted chewiness without compromising flavor.
This recipe focuses on achieving a **rich flavor** and an amazing texture while remaining accessible. With the right techniques, you’ll be amazed at how easily you can impress your family and friends with cookies that rival those from gourmet bakeries.
Ingredients You’ll Need
- All-Purpose Flour: The heart of the cookie dough. It provides structure and texture. You can substitute with **gluten-free flour** if needed.
- Unsalted Butter: This is crucial for flavor and contributes to achieving that tender texture. Make sure your butter is softened but not melted.
- Brown Sugar: This adds moisture and a deeper flavor compared to white sugar. It’s the secret to the chewiness of your cookies.
- Granulated Sugar: Works in harmony with brown sugar to create that perfect balance of sweetness. Both sugars together help yield a crispy edge and a soft center.
- Eggs: Provides binding and richness. Using large eggs ensures that the dough has enough moisture.
- Vanilla Extract: Adds warmth and enhances the overall flavor profile. It’s a small ingredient that makes a big difference.
- Baking Soda: This leavening agent brings lightness to your cookies. Make sure it’s fresh for the best results.
- Salt: A crucial ingredient that heightens all flavors, making the cookies well-rounded.
- Caramel Bits or Chunks: The star ingredient! These bits melt beautifully and create that delightful caramel experience in every bite.
Each of these ingredients plays a critical role in the overall success of your caramel cookies. Skilled bakers know that understanding the purpose behind each component leads to better baking. Substituting the wrong ingredient can drastically alter your results.
How to Make
1. **Preheat Your Oven**: Start by preheating your oven to 350°F (175°C). This ensures that your cookies bake evenly. While your oven is heating, you can prepare your dough.
2. **Mix the Dry Ingredients**: In a medium bowl, whisk together 2 ½ cups of all-purpose flour, 1 teaspoon of baking soda, and ½ teaspoon of salt. This crucial step ensures that the baking soda is evenly distributed throughout the flour, which helps the cookies rise properly.
3. **Cream the Butter and Sugars**: In a large mixing bowl, use a hand mixer or stand mixer to cream together 1 cup of softened unsalted butter, ¾ cup of packed brown sugar, and ¾ cup of granulated sugar. Beat on medium speed until the mixture is smooth and creamy—this should take about 3-4 minutes. You want the mixture to be light and fluffy, which introduces air into the dough.
4. **Add Eggs and Vanilla**: Beat in 2 large eggs, one at a time, ensuring each is fully incorporated before adding the next. Stir in 1 teaspoon of vanilla extract. This step adds richness to your batter and enhances the flavors overall.
5. **Combine Dry Ingredients**: Gradually add the dry ingredients into the wet mixture, mixing until just combined. Be careful not to overmix as this can lead to tough cookies. At this stage, you want to be gentle yet thorough.
6. **Fold in Caramel**: Gently fold in 1 cup of caramel bits or chunks. Using a spatula can help distribute the caramel evenly throughout the dough. This ensures that each cookie has a delightful burst of caramel in every bite.
7. **Scoop the Dough**: Use a cookie scoop or two spoons to drop rounded tablespoons of dough onto a baking sheet lined with parchment paper, spacing them about 2 inches apart. The dough will spread while baking, so give them some room to expand.
8. **Bake**: Place the baking sheet in the preheated oven and bake for 8-10 minutes, or until the edges are lightly golden, and the centers look set but soft. The magic happens here; they will continue to bake slightly after being removed from the oven due to residual heat.
9. **Cool Down**: Allow the cookies to cool on the baking sheet for about 5 minutes, then transfer them to a wire rack to cool completely. This process will ensure the cookies set properly while maintaining their chewy texture.
Following these steps allows you to make mouthwatering caramel cookies that are sure to impress. Happy baking!
Variations & Substitutions
Nutty Delight: Add ½ cup of chopped nuts like walnuts or pecans to the dough for an added crunch and nutty flavor. Nuts not only enhance the texture but also add nutritional value to your cookies. This variation is perfect for those who love a bit of crunch alongside the chewy texture of the cookie.
Chocolate Chip Fusion: Incorporate 1 cup of chocolate chips along with your caramel bits. The combination of chocolate and caramel is a classic favorite that appeals to people of all ages. The melting chocolate combined with the gooey caramel bits provides a magnificent burst of flavor in every bite.
Salted Caramel Cookies: For an extra layer of complexity in flavor, sprinkle a few flakes of sea salt on top of the cookies before baking. This addition enhances the sweetness of the caramel while providing a delightful contrast that elevates the background flavors of the cookie. It is an option that pleases both sweet and salty lovers.
Vegan Option: Substitute eggs with flaxseed meal (1 tablespoon of flaxseed mixed with 2.5 tablespoons of water) and replace butter with vegan margarine. This allows you to enjoy chewy caramel cookies without any animal products. Ensure that the caramel bits are also vegan if that is a concern.
Gluten-Free Cookies: Instead of all-purpose flour, use a gluten-free flour blend. Ensure the blend contains xanthan gum as this ingredient will help mimic the texture usually provided by gluten. This modification means that those on a restricted diet can also enjoy delicious caramel cookies without worrying about gluten.
Creating variations for your cookies allows you to be imaginative in the kitchen and adapt to different dietary needs or taste preferences.
Common Mistakes to Avoid
One of the most common mistakes in baking cookies is **overmixing your dough**. Once you add the dry ingredients, mixing too vigorously can develop gluten, resulting in tough cookies. Remember to mix just until combined to keep them soft and chewy.
Another issue many face is not using **room temperature ingredients**. If your butter is cold or your eggs are straight from the fridge, it can lead to uneven mixing. Always ensure your butter is softened and your eggs are at room temperature for consistent and even batter.
Pay also attention to **baking times**. It’s easy to assume that just because the timer goes off, your cookies are done. Check them when they look slightly underbaked—this ensures they stay chewy after cooling.
Don’t forget about the cooling period! While it may be tempting to dig in right away, letting your cookies cool on the baking sheet allows them to set properly. This step prevents them from breaking apart when you move them to a wire rack.
Storage, Freezing & Reheating Tips
Proper storage is essential to maintain the freshness of your caramel cookies. Once cooled, store the cookies in an airtight container at room temperature for up to a week. If you want to keep them longer, consider freezing them. Freezing helps maintain their flavor and texture for up to three months.
To freeze, allow the cookies to cool completely, then place them in a single layer in a freezer-safe bag or container. For easy grab-and-go options, consider layering parchment paper between them to prevent sticking.
When you’re ready to enjoy some frozen cookies, simply let them thaw at room temperature for about 30 minutes. For an extra touch, warm them briefly in the microwave for about 10-15 seconds or pop them in the oven at a low temperature until warmed through. This will reinvigorate their soft, chewy texture.
Always make sure to label your storage with the date of freezing to keep track of their freshness.
Frequently Asked Questions
How do I know when my cookies are done baking?
The best way to tell if your cookies are done is to look for a slightly golden edge and a soft center. They may appear underbaked but will continue to firm up as they cool.
Can I use different types of caramel for this recipe?
Absolutely! You can experiment with flavored caramels or even homemade caramel sauce. Just ensure you adjust the liquid in the recipe accordingly.
Why are my cookies spreading too much?
If your cookies are spreading excessively, this could be due to soft butter or not chilling the dough before baking. Chilling the dough for 30 minutes can help firm it up for better shape retention.
Can I make these cookies without eggs?
Yes! There are several egg substitutes available, including flaxseed meal, applesauce, or commercial egg replacers, which work wonderfully in this recipe while achieving a soft texture.
How can I enhance the flavor of my caramel cookies?
You can enhance the flavor by adding spices such as cinnamon or nutmeg, or using quality vanilla extract. You may also consider using flavored extracts such as almond for an interesting twist.
Conclusion:
Your caramel cookies are not just dessert; they are an experience to be shared and enjoyed. With the right ingredients, techniques, and a little understanding of what goes into achieving that **perfect chewiness**, you’ll be able to create an irresistible batch that satisfies your cravings. Don’t be afraid to savor the process and customize these cookies to make them your own. Get in the kitchen, have fun, and don’t hesitate to share your creations with friends and family. Happy baking!