Prep time: 15 minutes
Cook time: 20 minutes
Total time: 35 minutes
Servings: 12 bars
Have you ever craved a sweet snack that not only satisfies your taste buds but also fuels your body? Look no further than these delightful DIY Nut Bars, inspired by the popular KIND bars you’ve seen at the store! These bars don’t just tick the boxes for being nutritious and delicious; they also offer the ultimate convenience for busy individuals and families on the go. With a love for healthy eating, I’ve crafted this homemade version that is perfect for breakfast, a post-workout snack, or an afternoon treat. Get ready to impress your family and friends as you whip up these nutty, chewy, and crispy snacks!
What sets this recipe apart is its versatility and simplicity. You can customize your nut bars with your favorite types of nuts, seeds, or dried fruits, making each batch distinct and personal. By the end of this article, you’ll not only learn how to make these bars but also discover tips for variations, common mistakes to avoid, and even ways to store your creations for later enjoyment.
What Is Easy DIY Nut Bars | KIND Style Snacks at Home?
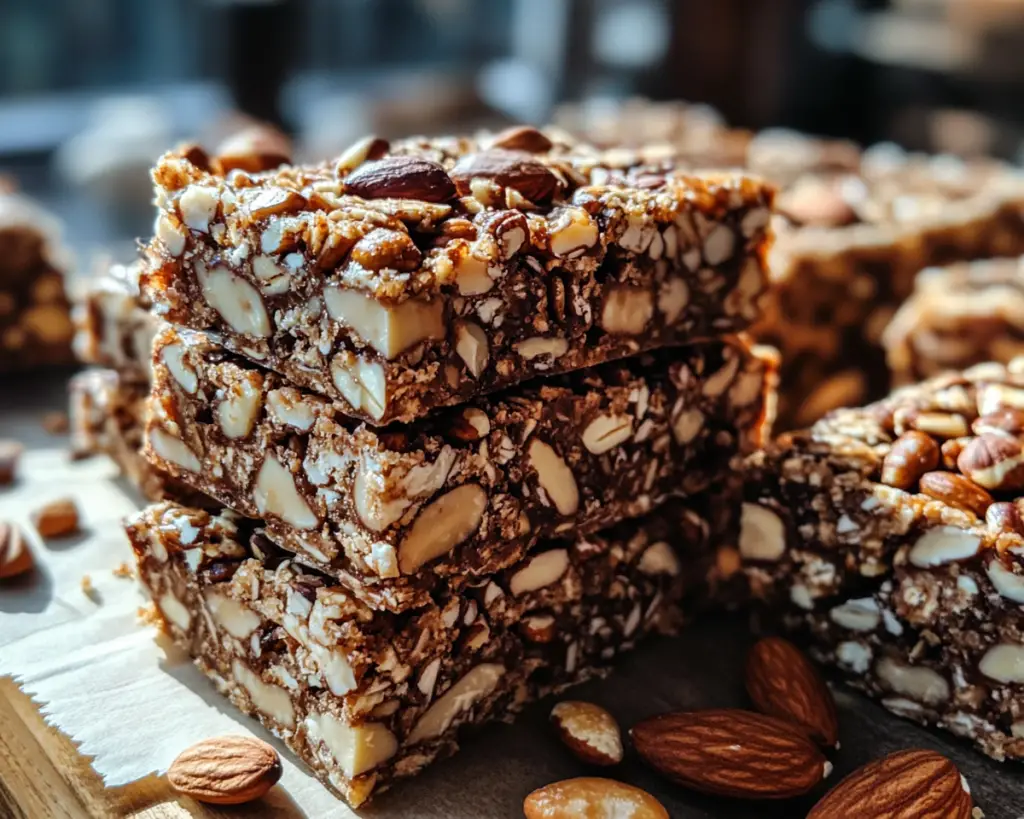
Easy DIY Nut Bars are a homemade version of the commercially available KIND bars that have gained immense popularity over the years. The dish originates from a desire to create nutritious snacks that combine wholesome ingredients without any artificial additives or excess sugars. The texture of these bars is a delightful balance of chewy and crunchy, thanks to the variety of nuts and seeds intermixed with sticky honey or maple syrup.
These nut bars feature a medley of flavors that dance on your palate, making each bite a sensory experience. The natural sweetness of honey contrasts beautifully with the savory notes of the nuts, while added fruits bring tartness and complexity. Not only are these bars delicious, but they are also incredibly versatile, allowing you to interchange a multitude of ingredients based on your personal preferences and dietary needs.
By making these nut bars at home, you can control the ingredients, ensuring they are free from preservatives and unnecessary sugars, unlike many store-bought options. They provide a perfect energy boost for busy days, keeping you satiated without sacrificing taste or texture.
Why You’ll Love This
There are countless reasons to fall in love with these Easy DIY Nut Bars. First and foremost, their irresistible taste is a major highlight. Imagine biting into a bar that perfectly blends sweet and nutty flavors with a satisfying crunch. As a bonus, the natural ingredients bolster your health. Almonds, walnuts, and other nuts are not only rich in healthy fats but also offer protein and fiber, keeping you full and energized.
Making these bars at home is also incredibly easy and economical. You likely already have many of the ingredients in your pantry, allowing you to whip them up without breaking the bank. This recipe is perfect for busy parents who want nutritious snacks for their kids or for anyone looking to stay healthy without sacrificing flavor.
A common misconception is that making nut bars is labor-intensive; however, that couldn’t be further from the truth. In just a few simple steps, you can prepare these bars. Plus, you have the freedom to explore various flavor combinations, allowing each batch to cater to your mood or dietary requirements. Whether you prefer a nut-free version or want to add proteins like chia seeds or flaxseed, the flexibility in this recipe will surely impress you!
Ingredients You’ll Need
- Oats: Rolled oats provide a great base for these nut bars, adding fiber and bulk. You can substitute with gluten-free oats if needed.
- Nuts: A mix of almonds, walnuts, and pecans not only offers a delicious crunch but also healthy fats. Feel free to swap out for your favorite nuts.
- Seeds: Pumpkin seeds or sunflower seeds add nutritional benefits and texture. They’re also a great source of protein.
- Dried Fruit: Chopped dates add natural sweetness, but you can use cranberries or apricots. Adjust the level of sweetness as desired.
- Honey or Maple Syrup: This sticky sweetener binds all the ingredients together while adding flavor. You can use agave syrup for a vegan option.
- Nut Butter: Almond butter or peanut butter enhances the richness and helps with binding. Choose your favorite or swap for seed butter if allergic to nuts.
- Vanilla Extract: A splash of pure vanilla brings depth to the flavor profile and enhances the overall taste.
- Salt: A pinch of salt balances the sweetness and elevates the flavors. Use sea salt for a gourmet touch.
Each ingredient serves a unique purpose, contributing not just to the final taste but also to the texture and nutritional value of the bars. When gathering your ingredients, consider personal net dietary needs or preferences to make this recipe truly yours.
How to Make
1. **Preheat the Oven:** Start by preheating your oven to 350°F (175°C). This step is essential as it prepares the environment for baking and ensures that the bars get a nice golden-brown color while developing flavor.
2. **Prepare Your Baking Dish:** Line an 8×8 inch baking dish with parchment paper. This will make it easy to remove the bars once they’ve cooled and will help avoid any sticking.
3. **Combine Dry Ingredients:** In a large mixing bowl, combine rolled oats, chopped nuts, seeds, and dried fruit. You want these to be mixed thoroughly so that the flavors marry during baking. This is where you can also add in any optional spices like cinnamon or nutmeg for additional flavor.
4. **Mix Wet Ingredients:** In another bowl, whisk together honey or maple syrup, nut butter, and vanilla extract. This combination should be smooth. Make sure your nut butter is at room temperature to facilitate easy mixing.
5. **Combine Mixtures:** Pour the wet mixture into the dry ingredients and stir well. You might find this challenging at first, but use a spatula or your hands to mix until all dry ingredients are completely coated.
6. **Press Into Pan:** Transfer the mixture into your prepared baking dish. Press it down firmly with your hands or the back of a spatula to ensure it sticks together and bakes evenly. A tightly packed mixture will yield a firmer bar.
7. **Bake:** Place the dish in the preheated oven and bake for about 20 minutes or until the top is lightly golden. Keep an eye on it towards the end to avoid burning. The aroma will fill your kitchen, making it hard to resist!
8. **Cool and Slice:** Remove the dish from the oven and allow the bars to cool completely in the pan. This is crucial as it allows the bars to set. Once thoroughly cooled, lift them out using the parchment paper and slice them into your desired bar size.
9. **Serve and Enjoy:** Finally, enjoy your Easy DIY Nut Bars as a healthy snack or meal replacement anytime during the day! Pack them in lunchboxes for work or school, and share them with friends!
Variations & Substitutions
Nut-Free Version: If you or someone you know has a nut allergy, you can easily make these bars nut-free. Substitute the nuts with more seeds or add in puffed rice or quinoa for added crunch. Using sunflower seed butter instead of nut butter will also maintain the richness while adhering to nut-free requirements.
Protein-Packed Bars: To make these bars even more filling, incorporate protein powder into the mixture. A serving of whey or plant-based protein can elevate the protein content significantly. Adjust the wet ingredients slightly by reducing them to keep the correct texture. These bars are perfect for athletes or those needing extra fuel for a busy day.
Chocolate Chip Nut Bars: A chocolate lover’s dream! Adding dark chocolate chips or cacao nibs can give your nut bars a sweet twist. Consider using unsweetened cacao nibs for a health-conscious option that can satisfy your cravings without added sugars. Just fold them into the mixture as you combine the wet and dry ingredients for a rich addition.
Fruit & Nut Mix: Perhaps you want more fruity flavors? Swap out part of the dried fruit with fresh ones like mashed banana or applesauce. This not only adds moisture but also sweetness. When using fresh fruit, consider reducing the amount of liquid sweetener to maintain consistency in your nut bars.
Low-Sugar Version: For those watching their sugar intake, you can substitute honey or maple syrup with mashed ripe bananas or unsweetened applesauce. This will reduce the sugar content significantly while keeping your bars moist and delicious. Caution: ensure your mixture stays firm enough to slice into bars.
Common Mistakes to Avoid
One common mistake when making nut bars is not packing the mixture tightly enough in the baking dish. If you don’t press it down firmly, your bars may crumble instead of holding their shape. Always ensure that the mixture is compacted and even throughout the baking dish.
Another frequent error is overbaking. It’s crucial to keep an eye on your bars, especially towards the end of the baking process. Overbaking can lead to hard, unpalatable bars. If you notice the edges browning too quickly, consider covering the dish with aluminum foil for the last few minutes to protect them.
Lastly, be cautious about ingredient substitutions. Not all ingredients behave the same when baked. For instance, using quick oats instead of rolled oats may result in a mushy texture. So, it’s best to use the recommended ingredients if you’re aiming for perfect nut bars on your first try.
Storage, Freezing & Reheating Tips
Once your Easy DIY Nut Bars are sliced and cooled, it’s important to store them properly to maintain their freshness. These bars can be kept in an airtight container at room temperature for about a week. If you want to extend their shelf life significantly, consider freezing them.
To freeze, wrap each bar in parchment paper or plastic wrap and place them in a resealable freezer bag. They will last for up to 3 months in the freezer. When you’re ready to enjoy one, simply take it out and let it thaw at room temperature for a few minutes or pop it in the microwave for 10-15 seconds to warm it up. This will restore some of the soft texture and flavor.
Always practice good food safety habits by making sure your ingredients are fresh and that your storage containers are clean. Keep monitoring the bars for any signs of spoilage, such as an off smell or any visible mold. Properly stored, these nut bars will stay delicious and enjoyable for a long time!
Frequently Asked Questions
Can I replace nuts with seeds in this recipe?
Absolutely! If you have nut allergies or prefer to avoid nuts for any reason, you can substitute nuts with seeds like sunflower or pumpkin seeds. This will still provide a great texture and flavor in your nut bars.
How do I know when the nut bars are done baking?
Your nut bars are ready when they are lightly golden on the top. Checking the edges for browning can also help you gauge readiness. Another indicator is that the mixture should be firm to the touch; if it feels too soft, it may need a few more minutes in the oven.
Can I add protein powder to my nut bars?
Yes, you can! Protein powder can be added to the mixture to provide an extra protein boost. Keep in mind that if you add protein powder, you may need to adjust the wet ingredients slightly to maintain the proper consistency.
What fruits can I use besides dried fruit?
In this recipe, you can use fresh fruit like mashed bananas or applesauce as a replacement for some of the sweeteners. Always remember to adjust the quantity of wet ingredients to retain the desired texture. Dried fruit like cranberries or apricots can also add a nice sweetness.
Can I make them vegan?
Definitely! To make these Easy DIY Nut Bars vegan, simply replace honey with maple syrup or agave syrup. Use dairy-free nut butter and follow the rest of the recipe as directed.
Conclusion:
These Easy DIY Nut Bars are not just a recipe; they are a way to enjoy nourishing and delicious snacks tailored to your taste. They allow you to explore flavors and ingredients, ensuring that every batch is a unique adventure. I encourage you to try them out, experiment with various combinations, and share your delightful creations with family and friends. With a little customization, these bars can fit any dietary need or flavor preference. So roll up your sleeves and dive into the world of homemade snacks that are both wholesome and utterly satisfying!