Prep time: 30 minutes
Cook time: 25 minutes
Total time: 55 minutes
Servings: 12
Imagine walking into a room filled with the sweet aroma of freshly baked cake, the light pink hues of frosting creating an instant smile. The Pink Ombre Layer Cake is not just a dessert; it’s a delightful experience packed into layers of spongy cake and silky frosting. Perfect for Valentine’s Day or any special occasion, this cake showcases your baking skills while being surprisingly easy to prepare. In this article, you will discover how to create this stunning cake, tantalizing variations, and invaluable tips to ensure that each layer is perfect.
What Is Pink Ombre Layer Cake Recipe Easy Valentine’s Day Showstopper?
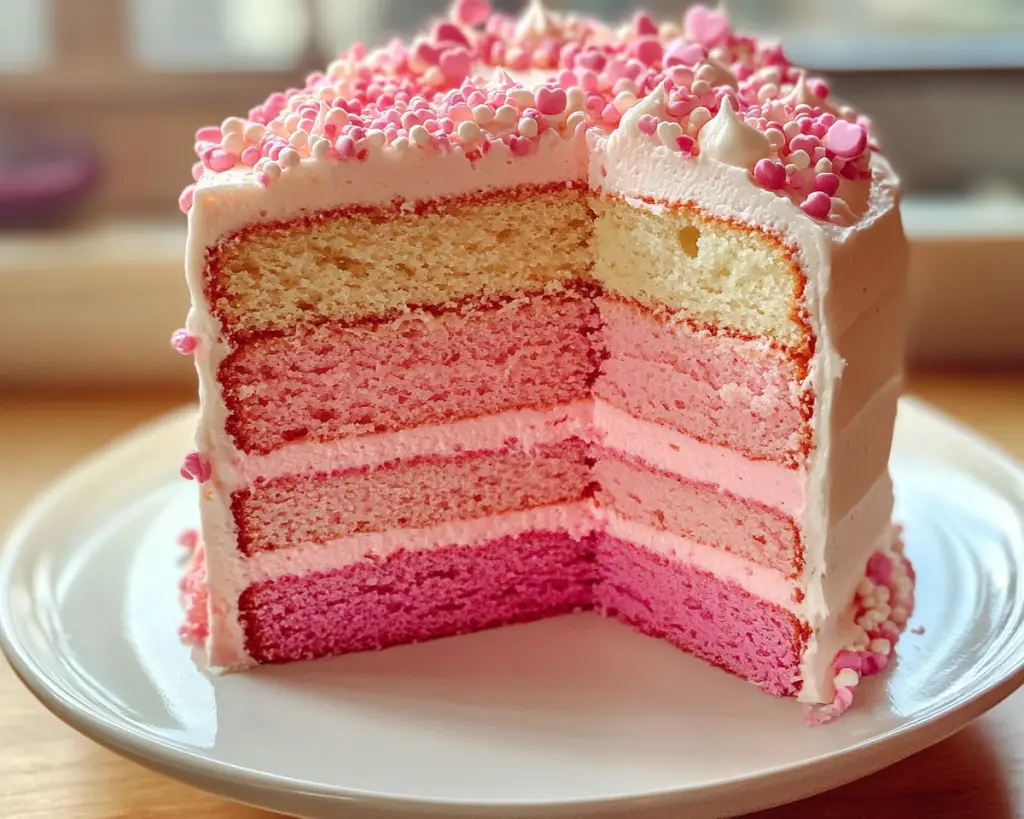
The Pink Ombre Layer Cake is a visually stunning dessert that features multiple layers of cake slowly transitioning in shades of pink. This cake is characterized by its fluffy texture and delightful sweetness, making it a favorite for celebrations. The delicate flavors of vanilla and the rich frosting bring an element of indulgence that elevates any meal. Originally popularized on social media platforms, the ombre effect has made its way into bakeries and home kitchens alike.
It’s not just about the appearance; the flavor is equally remarkable. Each slice of this layered cake reveals not only a beautiful gradient of pinks but also a moist, tender crumb that melts in your mouth. It’s a versatile cake that can be enjoyed with a scoop of ice cream or a dollop of whipped cream for added texture and taste. This cake easily becomes the centerpiece of any event, impressing both family and friends alike.
As you dive deeper into this recipe, you will realize how simple ingredients come together to create something extraordinary. Each method is designed to be approachable for beginner bakers while also providing opportunities for seasoned cooks to showcase their skills.
Why You’ll Love This
You’ll absolutely love this Pink Ombre Layer Cake for several reasons: the taste, the ease of preparation, and its versatility are just the tip of the iceberg. First, the cake combines fluffy vanilla layers with a creamy and rich buttercream frosting. It’s appealing to both children and adults, making it a hit at parties and gatherings.
Moreover, this cake offers a beautiful presentation that can brighten up any dessert table. You do not need to be an expert baker to achieve professional-looking results, making it an achievable goal for even the busiest home cooks. That said, one common misconception is that ombre cakes require advanced skills. In reality, with proper guidance, you will find that layering and coloring your cake can be a fun and straightforward process.
Another appeal of this cake lies in its cost-effectiveness. You most likely have the essential ingredients on hand—flour, sugar, eggs, and butter—meaning you can create an impressive dessert without breaking the bank. Whether it’s for a romantic dinner or a birthday party, this layer cake can fit the occasion.
Ingredients You’ll Need
- All-purpose flour: Provides the structure for the cake. If you need a gluten-free option, you can substitute it with a gluten-free flour blend.
- Granulated sugar: Adds sweetness. You may experiment with less sugar or alternative sweeteners if you wish to reduce calories.
- Baking powder: This leavening agent helps the cake rise and gives it a light texture. Make sure it’s fresh for best results.
- Salt: Enhances the overall flavor. A pinch makes a significant difference in sweet recipes.
- Unsalted butter: Provides richness and moisture. If you’re dairy-free, you can substitute with a vegan butter.
- Eggs: Essential for binding the ingredients together. If you need a vegan version, flax eggs or apple sauce can serve as alternatives.
- Milk: Adds moisture and helps to blend the ingredients smoothly. Nut milk or oat milk can be used as substitutes.
- Vanilla extract: Gives the cake a delightful flavor. A fresh vanilla bean can also be used for a more intense aroma.
- Pink food coloring: Essential for achieving the ombre effect. You can use gel coloring for more vibrant hues.
- Buttercream frosting: For frosting between layers and the outside. Feel free to flavor it with different extracts.
Each ingredient plays a significant role in the overall flavor and texture of the Pink Ombre Layer Cake. Understanding their function allows you to make informed substitutions and variations according to your taste or dietary needs.
How to Make
To create the Pink Ombre Layer Cake, follow these detailed instructions carefully.
- Preheat your oven to 350°F (175°C). Grease and flour three 8-inch round cake pans, ensuring that the surfaces are fully prepared to prevent sticking. Taking the time to properly prep your pans will result in a smoother release when you remove the layers.
- In a mixing bowl, combine the all-purpose flour, baking powder, and salt. Whisk well to blend them thoroughly. This step is crucial as it ensures an even distribution of the leavening agent throughout the flour.
- In another bowl, cream the unsalted butter and granulated sugar together until the mixture is light and fluffy. This typically takes 3 to 5 minutes. The air incorporated during this step contributes to the cake’s light texture.
- Add in the eggs one at a time, mixing well after each addition. Incorporate the vanilla extract as well. This step is important because it helps to emulsify the mixture, ensuring a uniform batter.
- Gradually add the dry ingredients to the wet mixture, alternating with the milk. Start and end with the flour mixture. Mix until just combined. Over-mixing can lead to a dense cake, so stop as soon as there are no visible dry spots.
- Divide the batter equally into three bowls. Using a toothpick or a dropper, add varying amounts of pink food coloring to each bowl—more coloring in one bowl, less in the other, and leave one bowl uncoloured. This will help achieve the beautiful ombre effect.
- Carefully pour the first, lightest shade of batter into the prepared pan and smooth the top with a spatula. Repeat this process with the second, medium shade of batter in the next pan, and the darkest shade in the last pan.
- Bake the cakes in the preheated oven for about 25 minutes or until a toothpick inserted into the center comes out clean. Keep an eye on them to avoid over-baking as each oven can vary slightly.
- Once baked, let the cakes cool in their pans for 10 minutes before transferring them to wire racks to cool completely. Allowing them to cool will make them easier to frost and assemble later.
- While the cakes are cooling, prepare your buttercream frosting. In a large mixing bowl, beat softened unsalted butter until creamy. Gradually add powdered sugar, milk, and vanilla extract until the desired consistency and flavor are reached.
- Once the cakes are fully cooled, level the tops of each layer to ensure an even stacking process. This will help maintain stability and ensure a beautiful presentation.
- Begin stacking the layers with the lightest color at the bottom and the darkest on top. Spread a generous layer of buttercream frosting between each layer. When you reach the top layer, you can frost the sides and top of the cake for a clean finish.
- To create a smoother finish, you may choose to apply a crumb coat—a thin layer of frosting to seal in any crumbs—before applying a thicker final coat of frosting. This step is optional but recommended for a polished look.
- Once decorated, let the cake sit at room temperature for about 30 minutes to let the frosting set. This allows the flavors to meld together beautifully.
With this detailed guide, you’ll have no trouble impressing everyone with your very own Pink Ombre Layer Cake.
Variations & Substitutions
Gluten-Free Variation: If you or your guests have gluten sensitivities, you can easily adapt this recipe by substituting the all-purpose flour with a gluten-free blend. Many commercial blends work well in baking; follow the package instructions for quantity. Not only does this make the cake accessible to more people, but it also retains the delicious flavors you love. Just keep an eye on the baking time, as gluten-free cakes can sometimes bake faster or slower than traditional ones.
Chocolate Ombre Cake: For chocolate lovers, you can incorporate cocoa powder into one of the layers, creating a delightful contrast to the vanilla flavors. Simply replace about 1/3 cup of flour with unsweetened cocoa powder. You can also alter the shades of pink to create a beautiful chocolate ombre cake that is equally stunning and delicious. Layering the chocolate against the pink creates an eye-catching dessert that will please any crowd.
Natural Food Coloring: If you are hesitant about using commercial food coloring due to concerns about artificial ingredients, consider substituting with natural dyes. Beetroot powder can achieve a lovely pink hue and adds a hint of earthy flavor. You can experiment with fruit purees, like raspberries, for a similar effect. Keep in mind that this will slightly alter the flavor, but the results are delightful and colorful.
Vegan Variation: To make this cake vegan, substitute the eggs with flax seeds or chia seeds mixed with water—one tablespoon of seeds mixed with three tablespoons of water works effectively. Likewise, replace dairy butter with coconut oil or a plant-based butter substitute. The result will be an equally delicious cake that everyone can enjoy, regardless of dietary restrictions.
Common Mistakes to Avoid
Baking can sometimes feel daunting, and common missteps can lead to disappointing results. One critical cooking warning is to ensure your ingredients are at room temperature. Ingredients like eggs and butter should not be straight from the fridge; this helps create an emulsion that results in a fluffy, well-mixed batter.
Another common mistake is not properly measuring the flour. Too much flour can lead to a dry cake. Always spoon the flour into the measuring cup and level it off with a knife for accuracy. Conversely, under-mixing the batter can leave you with an uneven texture. A gentle but thorough mix helps incorporate all ingredients without overworking the flour.
Lastly, don’t forget about the cooling process! Attempting to frost the cakes while they are still warm can lead to melting frosting or unstable layers. Allow each layer to cool completely on a wire rack for the best results.
Storage, Freezing & Reheating Tips
For optimal storage, keep the uneaten Pink Ombre Layer Cake covered in an airtight container at room temperature for up to three days. If you wish to store the cake for a longer time, it can be refrigerated for up to one week. Always ensure it’s wrapped tightly to prevent drying out and loss of flavor.
If you need to freeze the cake, ensure it’s well-wrapped in plastic wrap and foil, which will keep it fresh for up to three months. When you’re ready to enjoy it, let the cake defrost in the refrigerator overnight before bringing it to room temperature. This gentle thaw ensures that the texture remains appealing and fresh.
As for reheating, this cake is best enjoyed cold or at room temperature. However, if you prefer a warm treat, a quick pop in the microwave for about 10-15 seconds can provide a delightful experience, especially if it’s paired with a scoop of ice cream.
Frequently Asked Questions
Can I use a different flavor of frosting for this cake?
Absolutely! While the traditional buttercream is delightful, many variations can enhance your cake. Consider cream cheese frosting for a tangy kick or whipped ganache for a richer flavor. Feel free to experiment with flavors like lemon or almond to craft your signature cake.
How can I achieve a perfect ombre effect?
To achieve that dreamy ombre look, gradual mixing of the pink food coloring is key. Start with a small amount and build up until you reach your desired shades. Layering in thicker frosting between the colors also helps define the transitions, making the ombre effect visually stunning.
What can I use in place of eggs?
There are various substitutes depending on your dietary needs. For every egg, you can use 1 tablespoon of flax meal mixed with 3 tablespoons of warm water for a vegan option. Unsweetened applesauce also works as a binder, or consider specialized egg replacers available at your local grocery store.
Can I make this cake ahead of time?
Yes! You can bake the cake layers a day or two in advance and store them tightly wrapped at room temperature, or even freeze them for longer storage. Frothing the cake closer to the event will ensure the frosting is fresh and fluffy.
Is it necessary to use food coloring for this recipe?
While food coloring is essential for the ombre visual, you can certainly make this cake without it. For a beautiful look, focus on frosting techniques or learn to layer your frosting to showcase the natural colors of the cake. Adding natural food color alternatives will still give you some lovely hues.
Conclusion:
This Pink Ombre Layer Cake is more than just a dessert; it is a delightful celebration, full of flavor and texture each layer inviting you to take another bite. With the careful instructions provided and the potential variations, you can create a cake that truly reflects your style and taste. Don’t hesitate to experiment or customize it for your special occasion. Share it with friends, family, or save it for a serene moment for yourself. The joy of baking and sharing should always be celebrated, and this stunning cake is the perfect culmination of that joy. Happy baking!


