Prep time: 20 minutes
Cook time: 30 minutes
Total time: 50 minutes
Servings: 4
There’s something about the aroma of a freshly cooked blooming onion that can awaken nostalgia in any food lover. Whether you enjoyed them at family gatherings or your favorite restaurants, the experience of tearing off a crisp petal while indulging in that sweet, spicy sauce is unforgettable. This recipe for blooming onions transforms these memories into reality, allowing you to create a show-stopping appetizer right in your kitchen. It’s not only irresistibly appealing but also a wonderful conversation starter at parties. You’re in for a treat!
In this article, you’ll discover how simple it is to make blooming onions at home, with freshly prepared ingredients and a few pantry staples. You’ll learn about the essential techniques needed for achieving that golden-brown exterior while ensuring the onions remain tender and flavorful inside. Whether you’re planning a family movie night, hosting a party, or simply treating yourself, this guide will take you step-by-step through the making of this delicious appetizer.
What Is Blooming Onions Recipe – Easy, Irresistible Party Appetizer Guide?
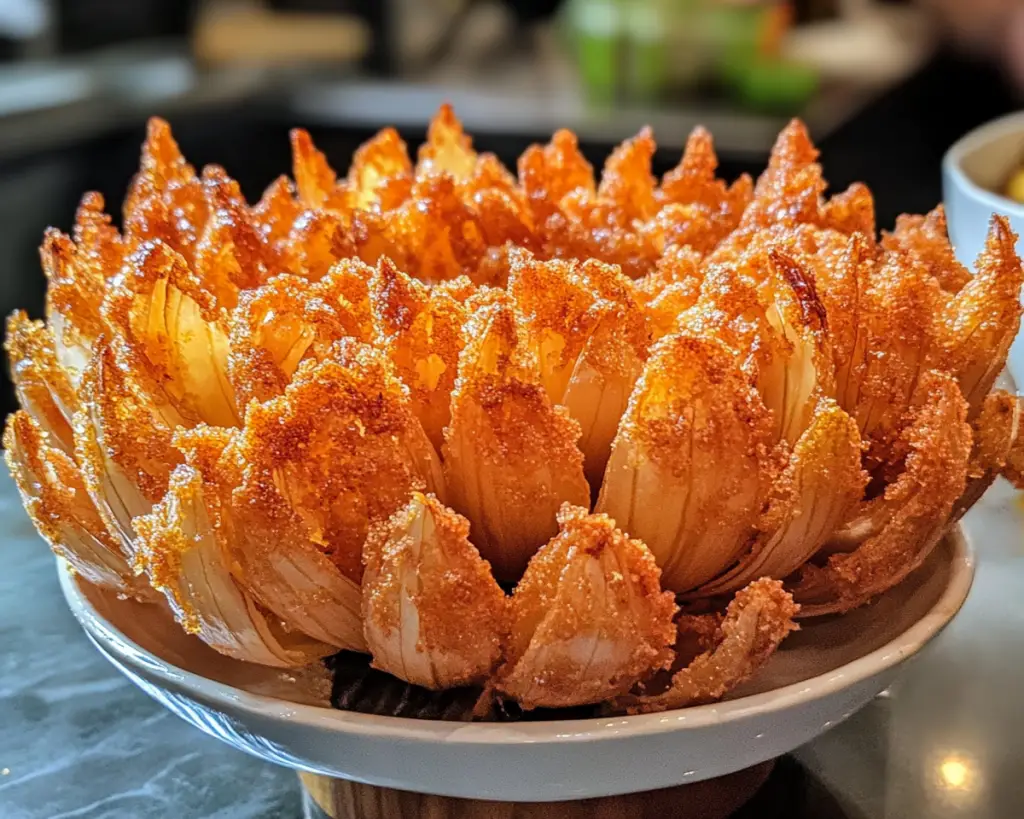
The blooming onion, originating from the United States, is a deep-fried onion that fans out into a beautiful flower shape, making it a delightful sight on any table. The onion is typically a large sweet onion, cut so that the petals open during cooking, allowing various seasonings and batter to enhance its natural sweetness. The outcome is a crispy exterior that gives way to tender, juicy onion petals, perfect for dipping.
Making a blooming onion at home allows you to customize everything from the batter to the spices used, ensuring a flavor profile that’s perfect for your taste. The combination of crunchy textures and the mouthwatering aroma of spices creates not only a satisfying dish to savor but also a captivating presentation that everyone will love. Moreover, this recipe brings a sense of accomplishment, perfect for impressing guests or indulging in a guilty pleasure.
Why You’ll Love This
This blooming onion recipe stands out for numerous reasons. First and foremost, the taste is absolutely amazing. The harmonious blend of spices paired with a crispy coating makes every bite a flavorful journey. It’s hard to resist reaching for just one more petal!
What truly sets this recipe apart is its simplicity. You don’t need to be a culinary expert to whip up this dish. With just a few straightforward steps, even novice cooks can achieve that restaurant-quality experience. Watch how quickly your family or friends rave about your cooking skills, and you might find yourself becoming the go-to chef for all future gatherings.
Cost-wise, making a blooming onion at home is surprisingly budget-friendly. Onions are inexpensive compared to other trendy appetizers, and you likely already have most of the ingredients in your pantry. Additionally, this dish offers a chance to explore healthier cooking methods. While traditional recipes call for deep frying, you can easily adapt this recipe for baking or air frying, providing a lighter alternative without sacrificing flavor.
Common misconceptions suggest that preparing a blooming onion is complicated or time-consuming. On the contrary, once you familiarize yourself with the straightforward steps, you will realize how easy and fun it can be! A beautiful, impressively delicious appetizer can certainly come from your kitchen.
Ingredients You’ll Need
- One large sweet onion – This is the star of the dish. Sweet onions provide the right balance of flavor and tenderness. You can substitute with Vidalia or Walla Walla onions for a similar taste.
- Flour – All-purpose flour is the base of the batter that gives the onion its crunch. You can experiment with gluten-free flour if needed.
- Cornstarch – This enhances the crispiness of the coating. It works in tandem with flour to make a light and crispy texture.
- Baking powder – This helps the batter rise while frying, creating an airy coating.
- Spices – A mix of paprika, cayenne pepper, garlic powder, and onion powder not only infuses flavor but also gives a beautiful color to the onion. Adjust the spices to your liking.
- Buttermilk – This adds moisture and tang to the batter. If you don’t have buttermilk, you can mix regular milk with a bit of vinegar or lemon juice.
- Oil for frying – Use vegetable oil or canola oil for frying. They have high smoke points and are ideal for deep frying.
- Dipping sauce – A mix of mayonnaise, ketchup, and spices makes a perfect companion for the blooming onion. You can add horseradish or chili sauce for extra zing.
Each ingredient plays a crucial role in achieving that perfect blooming onion. The onion’s flavor shines through with each bite, creating a delightful experience that combines crunch, aroma, and taste.
How to Make
- Preparing the Onion: Start with a large sweet onion. Cut about half an inch off the top, creating a flat surface. Peel off the outer layers, ensuring you maintain the onion’s integrity. This is essential for the blooming effect, as a well-prepared onion ensures even cooking. Turn the onion over to expose the root and make downward cuts, creating eight to twelve segments while avoiding cutting all the way through the root.
- Soaking: To enhance the flavor, soak the prepared onion in a bowl of cold water mixed with a teaspoon of salt for 30 minutes. This step allows the onion to remain crisp and aids in drying out the petals during cooking. Make sure the entire onion is submerged for the best results.
- Making the Batter: In a mixing bowl, combine one cup of flour, a quarter cup of cornstarch, a teaspoon of baking powder, and the desired spices like a half teaspoon of paprika and a pinch of cayenne for heat. Mix them thoroughly. This dry mix will create a flavorful coating that crisps up beautifully when fried.
- Dipping: Take the soaked onion out of the water and let it drain. In a separate bowl, pour one cup of buttermilk. Dip the onion into the buttermilk, allowing it to get coated evenly. Then, lift the onion and shake off any excess buttermilk before dredging it in the flour mixture. Make sure every petal gets covered; this will ensure you get a nice crispy exterior.
- Heating the Oil: Heat enough oil in a deep fryer or a heavy-bottomed pot to submerge the onion completely, around 2 to 3 inches deep. The oil should be heated to 375°F (190°C) for maximum crispiness. Use a kitchen thermometer to avoid overheating, which could burn the onion.
- Frying: Carefully lower the battered onion into the hot oil, using a slotted spoon. Fry for 3 to 5 minutes, turning occasionally until golden brown. The magic happens here as the petals bloom and crisp up. You will begin to smell the savory aroma filling your kitchen, a sign that it’s nearly done. Also, monitor the cooking process; you want it perfectly golden without burning.
- Draining: Once the blooming onion is golden, carefully remove it from the oil and let it drain on a paper towel-lined plate. This helps get rid of excess oil, ensuring that the onion remains crunchy.
- Serving: Let the blooming onion rest for a couple of minutes before serving. Prepare the dipping sauce by mixing mayonnaise, ketchup, and additional spices in a bowl. Serve the blooming onion warm with the sauce on the side, and watch your guests marvel at this delicious creation!
Follow these steps closely for a blooming onion that would impress any crowd. Don’t rush through the preparation; the tender, crispy result is well worth the time and effort.
Variations & Substitutions
Spicy Blooming Onion: For those who love a kick, consider adding more cayenne or even crushed red pepper to the batter. This variation changes the flavor significantly, making it a perfect fit for spicy food lovers. If you’re planning to serve this at a gathering, label it clearly, as the heat could be overpowering for some guests. Remember to adjust your dipping sauce with a bit of horseradish for extra zing, balancing the sweetness of the onion with a punch.
Herb-Infused Blooming Onion: Change the flavor profile completely by adding dried herbs like oregano, thyme, and basil into the batter. This is perfect for a Mediterranean twist. It’s an excellent option for those who appreciate a herby aroma lingering in their food. Whether served as an appetizer at a summer barbecue or a unique side for a casual dinner, this variation will introduce an unexpected pleasant taste that pairs well with various dips.
Cheesy Blooming Onion: If you’re a cheese aficionado, consider adding a fine layer of grated parmesan or cheddar to the coating before frying. This will create a deliciously cheesy layer that enhances the texture and flavor of the onion. Just be sure the cheese doesn’t burn during frying—keep an eye on it! This variation is perfect for a movie night snack or a fun addition to your family gatherings. Pair it with a cheesy sauce for double the indulgence!
Gluten-Free Blooming Onion: For those adhering to a gluten-free diet, it’s easy to adapt this recipe. Substitute regular flour with a gluten-free all-purpose blend and replace buttermilk with a non-dairy alternative like almond milk mixed with lemon juice. This substitution maintains the dish’s intended flavor and structure. It allows gluten-sensitive guests to enjoy this delightful appetizer without worry, expanding the appeal of your dish.
Common Mistakes to Avoid
One common mistake is cutting the onion improperly. If you slice too deeply, the petals will not hold together, causing the onion to fall apart during frying. To avoid this, make shallow cuts, and ensure you leave the root intact to hold the shape. Another misstep is not heating the oil properly; if it’s too cool, the onion will absorb oil instead of getting crispy. Ideally, monitor the oil temperature closely—375°F is the ideal target for a crispy outer layer.
Also, avoid overcrowding the frying pot. Frying too many onions at once can lower the oil temperature, leading to soggy or unevenly cooked onions. Fry one or two onions at a time to ensure proper blooming and even cooking. Finally, be cautious when removing the onion from the oil; hot oil can splatter, so use a slotted spoon to ensure safety and maintain stability.
Storage, Freezing & Reheating Tips
When it comes to storage, it’s best to enjoy blooming onions fresh, as they can lose their crispiness upon refrigeration. If you have leftovers, place them in an airtight container and store them in the fridge for up to two days. However, keep in mind that reheating will result in a less crispy texture.
For freezing, you can freeze the prepared but un-fried onions. After cutting and soaking the onion, batter it and lay it out on a baking sheet to freeze. Once frozen, transfer them to a freezer bag. This way, you can enjoy your blooming onion anytime by frying them straight from the freezer!
To reheat, ideally, use the oven to help restore some of the crispiness. Place the onion on a baking sheet and bake at 375°F (190°C) for about 10–15 minutes, or until heated through and crispy. Avoid using the microwave, as it can make the onion soggy.
Frequently Asked Questions
Can I make blooming onions ahead of time?
While it’s best to enjoy blooming onions fresh, you can prepare them ahead of time by soaking and battering the onion. Store it in the fridge and fry it just before serving for the ultimate crispy experience. This makes it a great option for parties, as you can minimize last-minute preparations.
What type of onion is best for blooming onions?
The best onions for this recipe are large sweet onions like Vidalia or Walla Walla, known for their mild flavor and sweetness. Keep in mind that yellow onions can be used as well, but they possess a stronger flavor. Selecting the right onion can truly affect the final result.
Can I adapt this recipe for air frying?
Absolutely! To make a blooming onion in an air fryer, simply prepare the onion and batter as instructed but instead of deep frying, place it in your preheated air fryer. Cook at 375°F for about 12–15 minutes, turning halfway through. You’ll still get that delightful crunch with a fraction of the oil!
How can I adjust the heat level of the blooming onion?
If you’re looking for a milder flavor, simply cut back on the cayenne pepper or skip it altogether. For heat lovers, feel free to add extra spices or even a dash of your favorite hot sauce to the batter. This flexibility allows you to tailor the flavor profile to cater to your guests’ preferences.
What dips go well with blooming onions?
The traditional dipping sauce is a mix of mayonnaise and ketchup, often with a bit of horseradish added for a spicy kick. However, feel free to experiment with ranch dressing, blue cheese dressing, or even a zesty garlic aioli. The right dip can elevate the onion even further, enhancing your overall culinary experience.
Conclusion:
This blooming onion recipe combines easy preparation, irresistible flavors, and a theatrical presentation that will make any gathering memorable. The fusion of crunchy crust and tender onion creates a delightful contrast, making each bite a pleasure. You can customize it to suit different tastes and dietary needs, ensuring everyone at your gathering can join in the enjoyment.
So why not try making this delightful appetizer today? Your friends and family will appreciate the effort, and you’ll get to bask in the accolades that come with it. You won’t regret spending your precious time in the kitchen for this delectable treat. Share your success on social media or with friends; you might just inspire someone else to create their version of this dish!