Prep time: 15 minutes
Cook time: 45 minutes
Total time: 1 hour
Servings: 8
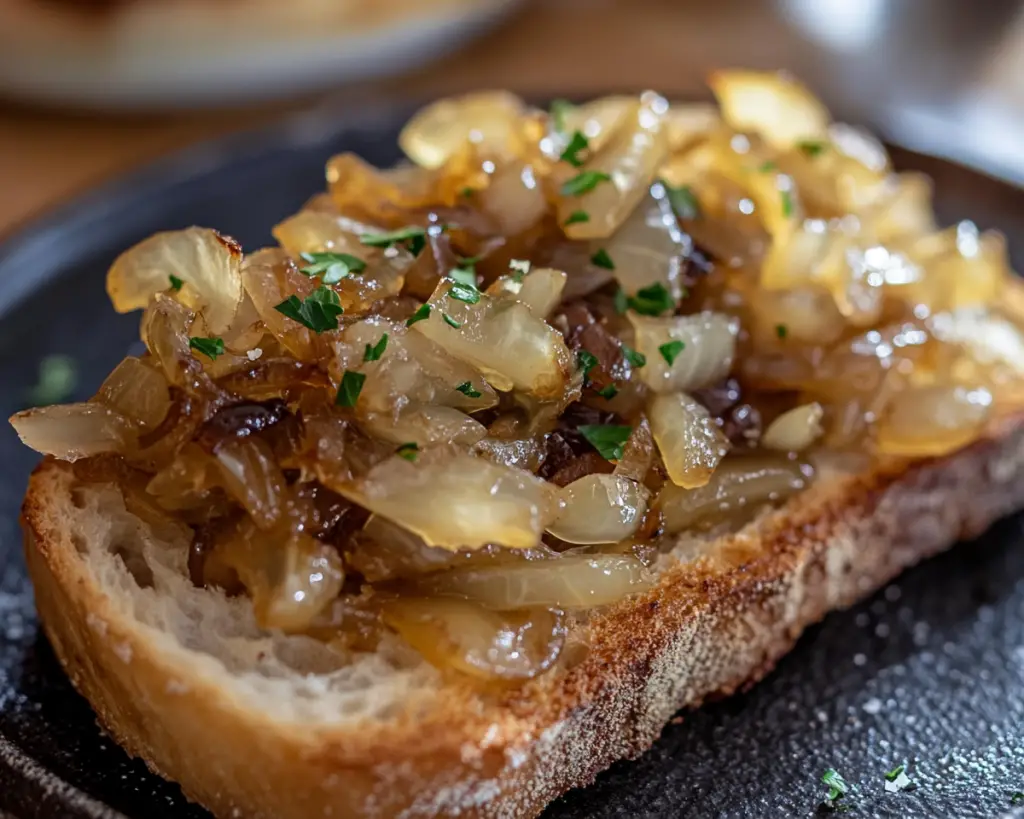
Imagine a delightful spread that transforms ordinary bread into an extraordinary experience. The rich, sweet flavor of caramelized onions combined with the robust taste of garlic can evoke fond memories of family gatherings or cozy evenings by the fireplace. This *Caramelized Onion and Garlic Spread* not only tantalizes your taste buds but also serves as a **versatile accompaniment** for various dishes. You’re about to learn not just how to make this fabulous spread, but also the secret tricks to make it perfect every time.
This recipe is special because it embodies simplicity without compromising flavor. The blend of onions and garlic mouthwatering aroma will fill your kitchen, making it an inviting space for family and friends. You’ll discover the nuances of caramelization—the phase where raw ingredients transform into a gourmet delight. Get ready to learn about texture, taste, and how to adapt it to your kitchen practices.
What Is Caramelized Onion and Garlic Spread?
*Caramelized Onion and Garlic Spread* is an artisanal delicacy that has roots in various culinary traditions. At its core, it’s a combination of finely chopped onions and garlic that are slowly cooked until they reach a golden brown hue. This gentle process of cooking enhances the flavors, resulting in a spread that is both **sweet and savory**. The texture is smooth yet chunky, providing a satisfying mouthfeel that is perfect for spreading on crackers, bruschetta, or sandwiches.
The deep, *complex flavor profile* is what makes this spread truly special. It marries the sweetness of caramelized onions with the pungence of garlic, creating a delightful contrast that can elevate any dish. Originating from Mediterranean kitchens, this spread has gained popularity around the globe as a versatile component in appetizers, sandwiches, and even as a topping for grilled meats.
And while making this spread might seem daunting at first, the truth is that with a bit of patience and the right technique, you’ll have a gourmet delight ready in no time. Whether you’re serving it at a party or enjoying it during a quiet evening at home, it seamlessly fits into any occasion.
Why You’ll Love This
There are plenty of reasons to love *Caramelized Onion and Garlic Spread*. First and foremost, the **taste** is absolutely heavenly. The natural sweetness that develops during caramelization is enhanced by garlic’s strong flavors, providing a balance that will have you craving more. This spread can also transform plain groceries into something remarkable, making mealtime exciting—even for busy parents or beginners in the kitchen.
Another aspect to appreciate is its **ease of preparation**. With simple ingredients and straightforward steps, you can whip this up, minimizing oven or stove time. You can make a big batch ahead of time, which is particularly great for meal prep and ensuring that you always have a gourmet option on hand. This spread is also quite **cost-effective**; using basic pantry staples, you can create something far superior to store-bought versions.
Moreover, *Caramelized Onion and Garlic Spread* is incredibly **versatile**. Whether you’re spreading it over crackers for an appetizer, adding it to sandwiches for extra depth, or using it as a topping for meats or roasted vegetables, its adaptability is impressive. You might even find that it makes a delightful addition to pasta dishes; the possibilities are truly endless.
Lastly, understanding how to *caramelize onions* and garlic can improve your overall cooking skills. It’s a cooking technique that is often overlooked but is essential for elevating flavors in numerous dishes. Don’t fret if you’ve tried this before and didn’t succeed; common mistakes will be covered later in this article.
Ingredients You’ll Need
To make this delicious spread, you’ll need the following ingredients:
- Yellow onions: Their sweetness is ideal for caramelization. You can substitute with red onions for a different flavor, but they may require more time to caramelize.
- Garlic: Fresh garlic is key for its robust flavor. You can use garlic powder in a pinch, but the taste will differ.
- Olive oil: Use extra virgin for its superior taste. Butter can be substituted for a richer flavor, although it may burn quicker.
- Salt: Essential for enhancing the natural flavors of the onions and garlic. Use kosher or sea salt for the best results.
- Pepper: Freshly ground black pepper provides a kick. Feel free to adjust the amount according to your preference.
- Balsamic vinegar: This adds depth and acidity. You can replace it with apple cider vinegar for a different tang.
These ingredients are usually found in most kitchens, making it accessible regardless of your cooking expertise. Adjust these ingredients according to your dietary needs. For instance, opting for **low-sodium salt** can make it suitable for those watching their sodium intake.
How to Make
Follow these step-by-step instructions to create your *Caramelized Onion and Garlic Spread*:
- Prepare the Ingredients: Start by gathering all the ingredients. Peel and thinly slice the yellow onions, ensuring they are even in size for uniform cooking. Mince the garlic to release its oils and flavor. Measure out your olive oil, salt, pepper, and balsamic vinegar. It’s important to have everything ready, so you don’t lose any time in the cooking process.
- Heat the Oil: In a large skillet or saucepan, add about 2 to 3 tablespoons of olive oil over medium heat. Allow it to heat until it shimmers. The trick here is to understand that if the oil is too hot, it may burn the onions rather than caramelize them. Medium heat prevents this.
- Add the Onions: Once the oil is hot, introduce the sliced onions. Stir them well to coat in oil and season with a pinch of salt. What you’re aiming for here is to soften them a bit before they start caramelizing. Stir frequently for the first 10 minutes.
- Let Them Caramelize: After the onions have softened, reduce the heat to low and let them cook for about 30-40 minutes. Stir occasionally, scraping the bottom of the pan to deglaze any onions that might stick. A good tip is to be patient; true caramelization takes time. You want them to become a deep golden brown, with a rich, sweet aroma filling your kitchen.
- Add Garlic: In the last 5 minutes of cooking, sprinkle in the minced garlic. This allows it to infuse flavor without burning. Keep an eye on it, as garlic can go from perfectly golden to burnt in seconds.
- Finish with Balsamic Vinegar: Once the onions and garlic have caramelized beautifully, add a splash of balsamic vinegar. This will bring a rich acidity that balances the sweetness. Stir well and allow it to cook for another 1-2 minutes to reduce the vinegar slightly.
- Cool and Store: Remove the spread from the heat and let it cool. Once cooled, transfer it to a food processor or leave it chunky, depending on your preferred texture. Store in an airtight container in the fridge, where it can last for up to two weeks.
Taking the time to properly caramelize your onions and garlic will reward you with a sweet, savory flavor that’s worth every minute. Remember, patience is key, and the aromas alone will make it hard to resist!
Variations & Substitutions
Herb-Infused Variation: By adding fresh herbs like thyme or rosemary during the last 10 minutes of cooking, you can enhance the flavor profile immeasurably. Fresh herbs offer aromatic qualities that complement the *caramelized onion and garlic spread* beautifully, making it suitable for herb lovers. Just chop and toss them in toward the end of the cooking process to avoid wilting too much.
Spicy Variation: For those who enjoy a kick, consider adding a pinch of red pepper flakes or cayenne pepper. This will introduce a hint of heat that contrasts the sweetness of the onions. Alter the quantity based on your heat tolerance; remember that you can always add more, but it’s challenging to reduce the heat once added!
Vegan Variation: This recipe is naturally vegan, but if you want an *oil-free version*, you can sauté the onions and garlic in vegetable broth instead of olive oil. This option is perfect for those focusing on a leaner diet. The flavor will differ, but it’s a terrific substitute for health-conscious individuals.
Cheesy Variation: For a decadent twist, try mixing in a bit of cream cheese or goat cheese after blending the *caramelized onion and garlic spread*. This adds a creamy texture and an additional layer of rich flavor. It’s particularly delightful served as a dip for vegetables or spread on bread.
Nutty Variation: Incorporating toasted nuts such as walnuts or pecans provides a lovely crunch and can elevate the spread’s flavor. Simply chop the nuts and mix them into the spread for an irresistible texture contrast. It’s an exciting way to add both nutrition and flavor.
Common Mistakes to Avoid
Making *Caramelized Onion and Garlic Spread* seems straightforward, but there are a few common pitfalls to be aware of:
Cooking at Too High Heat: One of the most frequent mistakes is using high heat to speed up the caramelization process. This will lead to burnt onions rather than sweet, golden ones. Always adhere to medium to low heat to allow for gradual caramelization and *maximize flavor development*.
Not Stirring Enough: If you don’t stir the onions and garlic occasionally, they may stick to the pan and burn. Keep a spatula handy and make sure you stir every few minutes, especially during the initial phase when the onions are softening.
Overcooking the Garlic: Garlic can go from beautifully golden to completely burnt in mere seconds. It adds a wonderful depth to the spread, so it’s essential to add it later in the cooking process and remain vigilant. Once you see it turn a golden color, remove it from the heat for the best flavor.
Improper Storage: If the spread is not stored in an airtight container, it may dry out or lose its distinctive flavor. Always ensure that the container is sealed tightly, and remember that this spread can be frozen for longer storage.
Storage, Freezing & Reheating Tips
Knowing how to store your *caramelized onion and garlic spread* properly is crucial for maintaining its flavor and texture. After the spread has cooled completely, transfer it to an airtight container. This will keep the spread fresh for up to two weeks in the fridge. For even longer storage, consider freezing it.
To freeze the spread, use smaller freezer-friendly containers or even ice cube trays. This way, you can easily defrost small portions as needed. When you’re ready to use it, just transfer the container to the fridge overnight to defrost or use the microwave to warm smaller portions. Ensure you give it a good stir to redistribute any separated oils or liquids.
It’s vital for food safety to remember that once defrosted, you should not refreeze the spread. Consuming homemade spreads within a suitable timeframe will ensure you experience their maximum flavor and quality.
Frequently Asked Questions
Can I use other types of onions?
Absolutely, you can use different varieties of onions. Each type will provide a unique flavor profile. For example, red onions will offer a sharper taste, while sweet onions like Vidalia will be even sweeter. Make sure to adjust the cooking time as needed, as different onions may caramelize at different rates.
Why didn’t my onions caramelize properly?
If your onions remain pale, you may be cooking them at too high a heat. Ensure you’re using medium or low heat and allow sufficient time for caramelization—about 30-40 minutes. Stir regularly and be patient; this process is all about time.
How do I use this spread?
This versatile spread can be enjoyed in many ways. It is perfect on a charcuterie board, slathered on toast, or used as a sandwich spread. You could also mix it into pasta dishes or use it as a topping for grilled meats or roasted vegetables.
Can it be made ahead of time?
Definitely! This spread actually tastes better when made ahead of time. Store it in a sealed container in the refrigerator and allow the flavors to develop. It can stay fresh for about two weeks, making it an excellent choice for meal prep.
What are the best pairings for this spread?
Consider serving this spread with crusty bread, crackers, or even as a topping for grilled meats. Pair it with various cheeses for a delightful appetizer, or use it to enhance the flavor of baked potato dishes. There are endless possibilities!
Conclusion:
In summary, making *Caramelized Onion and Garlic Spread* is an rewarding culinary adventure that can take your meals to the next level. Its rich flavor, ease of preparation, and versatility make it a staple worthy of your kitchen. I encourage you to try this recipe, customize it to your liking, and share it with family and friends. Once you experience the delightful nuances of caramelization and the harmonious blend of flavors, you’ll find it hard to resist. Elevate your cooking; the world of flavor is waiting for you!