Prep time: 20 minutes
Cook time: 15 minutes
Total time: 35 minutes
Servings: 12 mini cheeseburgers
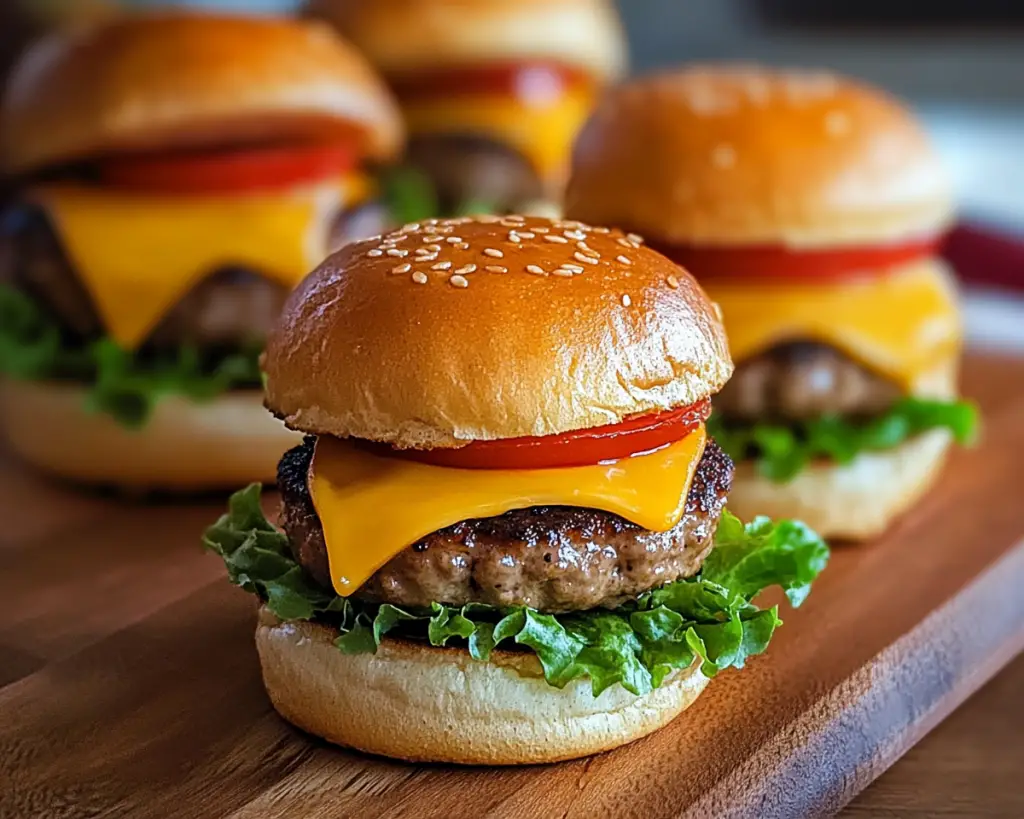
Mini cheeseburgers are the perfect bite-sized delight that promises to bring a smile to anyone’s face as they evoke memories of summer barbecues and casual gatherings. Just imagine a juicy mini patty nestled between two perfectly toasted buns, topped with melty cheese and your favorite condiments. Whether you’re hosting a party, looking to please the kids, or just craving a fun twist on the classic cheeseburger, these mini versions pack all the flavor in a manageable size.
What makes them even better is their adaptability; you can mix and match toppings based on personal preferences, which makes them universally loved. In this article, you can expect to learn everything there is to know about making, storing, and customizing mini cheeseburgers, ensuring your burger-making experience is both enjoyable and successful.
What Is Mini Cheeseburgers?
Mini cheeseburgers, often referred to as “sliders,” are small-scale versions of traditional cheeseburgers. Originating from American cuisine, these bite-sized burgers typically feature a smaller patty—usually about 2 to 3 ounces—placed on a small hamburger bun. The beauty of mini cheeseburgers lies in their versatility; they can be customized with an array of toppings like cheese, lettuce, tomatoes, pickles, onions, and various condiments.
The texture of mini cheeseburgers is a delightful contrast—crispy on the outside when grilled or pan-fried, and tender on the inside. The flavor is often enhanced by the caramelization that occurs during the cooking process, sealing in the juiciness of the meat and allowing it to lock in those savory flavors. These sliders can be served in any casual setting, from family dinners to birthday parties, making them an ideal recipe for various occasions.
Why You’ll Love This Mini Cheeseburgers
There are countless reasons why you’ll adore making mini cheeseburgers. For starters, their small size makes them ideal for gatherings where guests prefer sampling different flavors—perfect when serving a crowd. Each guest can try several without feeling overly stuffed, opening the door to a variety of tailgating flavors.
Furthermore, mini cheeseburgers are incredibly easy to make. The process involves basic ingredients that most people usually have at home. Compared to traditional burgers, they require less cooking time, making them a quick dish to prepare, especially for busy parents or weeknight dinners.
Additionally, they can be easily customized to accommodate different dietary needs, including vegetarian, vegan, and gluten-free alternatives. Using plant-based patties, gluten-free buns, or incorporating sautéed veggies can ensure that everyone can enjoy these delicious sliders. There is no need for extensive cooking techniques or fancy equipment—just a skillet or grill, and you’re all set!
Ingredients You’ll Need
- Ground beef: Choose ground chuck (80/20 ratio) for the best balance of flavor and juiciness. You can substitute with ground turkey or chicken for a healthier alternative.
- Mini burger buns: Look for pre-made slider buns or mini brioche buns. You can also use lettuce wraps for a low-carb option.
- Cheese: American cheese is traditional, but you can use cheddar, Swiss, or Pepper Jack for added flavor.
- Condiments: Ketchup, mayonnaise, mustard, and pickles are standard, but feel free to get creative with BBQ sauce or spicy sriracha.
- Vegetables: Lettuce leaves, sliced tomatoes, and onions add freshness and crunch. Consider grilled onions for a smoky flavor.
- Spices: Salt, pepper, and garlic powder enhance the taste of the patties.
Each ingredient enriches the flavor profile of the mini cheeseburgers, ensuring that every bite is memorable. Don’t hesitate to switch up ingredients based on what’s available and your personal cravings.
How to Make Mini Cheeseburgers
1. **Prepare the Patties:** In a large bowl, combine the ground beef with salt, pepper, and optional spices like garlic powder. Mix gently to avoid overworking the meat, which can lead to tough patties. Form the mixture into mini patties, about 2-3 inches in diameter and roughly ½ inch thick. Use your thumb to create a small indent in the center of each patty, which helps them cook evenly.
2. **Heat the Grill or Skillet:** Preheat a skillet or grill over medium-high heat and lightly oil the surface to prevent sticking. Make sure it’s very hot before adding the patties; this will help develop a nice crust.
3. **Cook the Patties:** Place the mini patties on the grill or skillet in a single layer. Cook for about 3-4 minutes on one side without moving them to allow a proper sear. Flip the patties and cook for another 2-3 minutes. If using cheese, place a slice on each patty after flipping, covering the pan with a lid to melt the cheese quickly.
4. **Toast the Buns:** As the patties are finishing cooking, place the buns cut-side down on the grill or in another skillet for about 1 minute, or until golden and crispy. This enhances the flavor and prevents the buns from becoming soggy.
5. **Assemble the Sliders:** Place each cooked patty onto the bottom half of a toasted bun. Add your choice of toppings, including condiments, vegetables, and any additional gourmet items if desired. Finally, place the top half of the bun on each mini cheeseburger.
6. **Serve and Enjoy:** Arrange your mini cheeseburgers on a serving platter. They can be served with small skewers or toothpicks for easy serving. Pair them with appetizers like chips, veggies, or a dipping sauce for added enjoyment.
5 Variations & Substitutions
Cajun Style Mini Cheeseburgers: If you’re in the mood for some heat, consider adding Cajun seasoning to your beef mixture. This will enhance the flavor while infusing a spicy kick. Top with pepper jack cheese and a spicy remoulade for a have-it-your-way experience.
Vegetarian Mini Cheeseburgers: For a plant-based option, use black bean patties or portobello mushrooms. Both options are flavorful, nutritious, and can be customized with different toppings, giving your meatless sliders a rich taste without sacrificing texture.
Hawaiian Sliders: Give your mini cheeseburgers a tropical twist by incorporating teriyaki sauce into your meat and topping it with grilled pineapple, jalapeños, and a slice of mozzarella cheese. This combo brings new flavors for a special twist.
Tex-Mex Mini Cheeseburgers: Update your recipe by incorporating taco seasoning into your ground beef, then topping each slider with guacamole, salsa, and sliced jalapeños. Tortilla chips can also be served on the side for an added crunch effect.
Gluten-Free Mini Cheeseburgers: Replace traditional buns with gluten-free slider buns or lettuce wraps. They offer a fresh alternative while keeping the flavors of the cheeseburger intact, making them a perfect choice for gluten-sensitive individuals.
Common Mistakes to Avoid
A common mistake when making mini cheeseburgers is pressing down on the patties while they cook. This action causes the juices to escape, drying out the meat. Instead, flip them carefully and avoid excessive flipping to get the perfect sear without losing flavor.
Another pitfall is using leaner meat than necessary. Using a lower-fat content ground beef can lead to dry sliders. Aim for a mix that’s at least 80% lean to ensure juicy, flavorful mini cheeseburgers.
Finally, don’t forget to toast your buns! When the buns are warm and crispy, they add contrast to the tender patty. Not to mention, it keeps them from becoming soggy—nothing ruins a great burger like a squishy bun.
Storage, Freezing & Reheating Tips
If you plan to make mini cheeseburgers in advance, they store remarkably well. Simply place any uneaten sliders in an airtight container in the refrigerator for up to 3 days. To reheat, place them on a skillet over low heat until warmed through to avoid drying out.
If you want to freeze them, make sure to cool the burgers first, then individually wrap each slider in plastic wrap and place them in a freezer-safe bag. They can last up to 3 months in the freezer. To reheat from frozen, bake at 350°F until warmed through; this will help maintain their deliciousness.
For outdoor maneuvers, ensure proper food safety by refrigerating any mini cheeseburgers left out for more than 2 hours. Leftovers should be kept below 40°F to prevent any risk of bacteria growth.
Frequently Asked Questions
Can I use ground turkey instead of beef for mini cheeseburgers? Yes! Ground turkey can be substituted for a lighter option without sacrificing taste. Just be mindful that turkey is leaner, so adding a bit of olive oil or seasoning may be necessary to maintain flavor and moisture.
What are good toppings for mini cheeseburgers? The toppings are only limited by your imagination! Some classics include lettuce, tomato, onions, pickles, ketchup, mustard, and mayonnaise. More adventurous toppings might include avocado, bacon, mac and cheese, or specialty sauces to enhance flavor complexity.
How can I make mini cheeseburgers ahead of time? To prep ahead, form the patties and store them on a tray covered with plastic wrap in the refrigerator for up to 24 hours before cooking. You can also fully assemble cheeseburgers, but for best results, wait to add toppings that could get soggy until just before serving.
What is the best way to cook mini cheeseburgers? You can pan-fry, grill, or bake them. Each method offers unique flavors and texture. Grilling adds a lovely smokiness, while baking is a more hands-off approach. Choose the method that suits your space and comfort level.
Can I make mini cheeseburgers in the oven? Absolutely! You can bake them on a baking sheet lined with parchment paper at 375°F for about 15-20 minutes, flipping halfway through for even cooking. This method is perfect for batch cooking for parties.
Conclusion:
In summary, mini cheeseburgers are an exciting, adaptable dish for any occasion, offering all the irresistible flavors of a traditional burger in a perfect size. Their ease of preparation, paired with the ability to customize according to palate preferences, makes them a go-to choice for many home cooks. Get creative with toppings and variations to make it your own, whether you’re hosting a party or whipping up a casual weeknight dinner. Don’t hesitate to try this recipe, tailor it to your liking, and share the joy with friends and family! Grab your ingredients and fire up the grill—mini cheeseburger magic awaits!