**Prep time:** 20 minutes
**Cook time:** 25 minutes
**Total time:** 45 minutes
**Servings:** 24 cake balls
There’s something undeniably special about the flavors of fall, and this easy pumpkin cake balls recipe captures that essence beautifully. With the warmth of spices, moist pumpkin cake, and a smooth coating of chocolate, these treats are perfect for autumn gatherings, cozy family hors d’oeuvres, or potluck desserts. Imagine biting into a tiny sphere of pumpkin spice, chocolate, and frosting that delivers a lift of nostalgia for chilly autumn breezes and vibrant foliage.
In this guide, you will not only learn how to make these delightful cake balls but also uncover tips and variations to customize them for any occasion. Get ready to impress your friends and family with these delicious bites!
What Are Pumpkin Cake Balls?
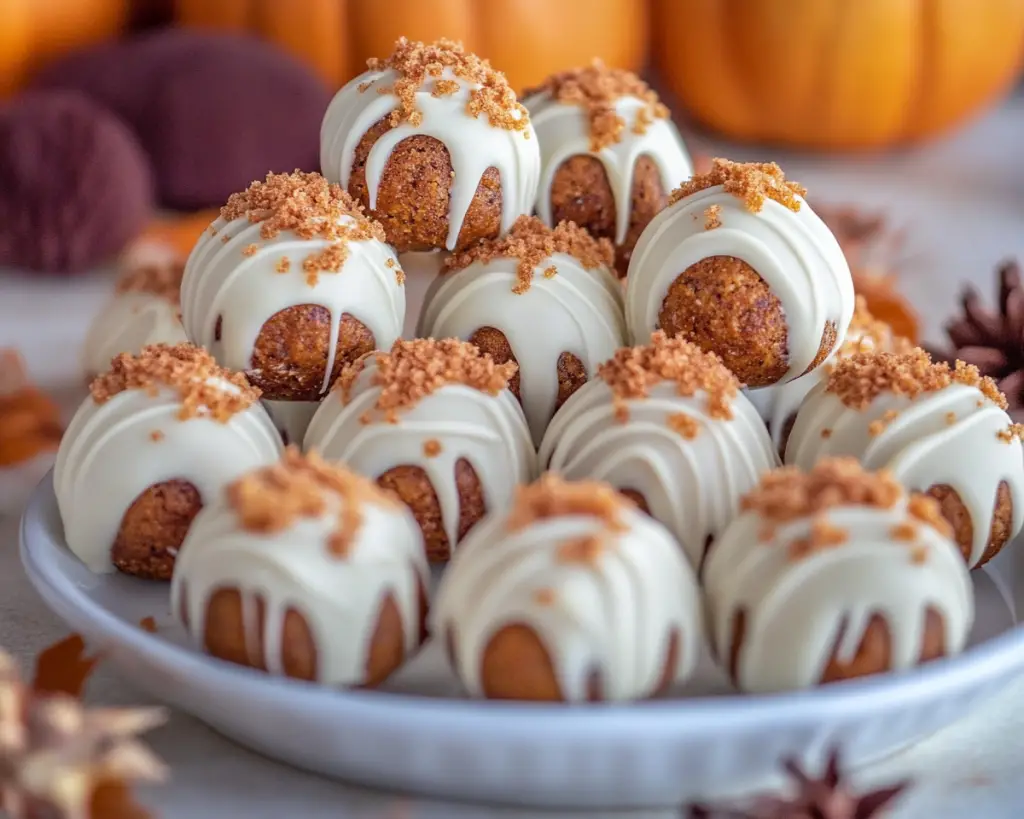
Pumpkin cake balls are a delightful no-fuss dessert made by combining moist pumpkin cake with frosting, rolled into bite-sized balls, and coated in chocolate. The concept of cake balls is derived from the popular cake pop trend, which has taken its place among modern dessert favorites thanks to its convenient size and versatility.
Originating from the need to use leftover cake and frosting, cake balls often feature various flavors to cater to different palates. In our case, the star ingredient is *pumpkin puree*, which lends an aromatic essence to the cake and a rich, moist texture. The wonderful blend of *cinnamon, nutmeg, and cloves* adds that quintessential fall flavor profile that we all adore. Many times, these treats are visually appealing when generously coated in chocolate, making them not only a treat for the taste buds but for the eyes as well.
Whether served on their own or as part of a dessert table, pumpkin cake balls offer the perfect balance of sweetness and spice that brightens up any gathering.
Why You’ll Love This Pumpkin Cake Balls Recipe
There are countless reasons why this pumpkin cake balls recipe is going to become your go-to for fall festivities! Here’s what makes this treat a must-try:
1. **Effortless to Prepare**: This recipe is incredibly easy and straightforward. With just a few ingredients and minimal steps, you can whip up a batch of delectable treats in no time. It’s perfect for busy parents or beginner bakers with limited time.
2. **Versatile Flavors**: Pumpkin cake balls can be adapted with various coatings, flavors, and ingredients to customize them for different preferences. Whether you prefer dark chocolate, white chocolate, or even a simple dusting of powdered sugar, possibilities are endless. Each variation can cater to different taste buds!
3. **Party-Ready**: With their fun and festive appearance, pumpkin cake balls are a hit at fall parties, Halloween gatherings, or Thanksgiving celebrations. They’re easy to serve, transport, and even eat without the need for utensils, making them a practical addition to any party spread.
4. **Health Consciousness**: Pumpkin is packed with nutrients such as *vitamin A*, *fiber,* and *antioxidants*, making it a healthier choice than traditional sugary desserts. With the use of pumpkin puree, this recipe inadvertently becomes a delightful way to incorporate vegetables into your treats.
5. **Allergens Awareness**: You can easily adjust the recipe to accommodate dietary restrictions, such as gluten-free or dairy-free diets, by using appropriate substitutes.
6. **Homey Aroma**: As the cake bakes, your home will be filled with an incredible aroma that marries spices and pumpkin—a true autumn experience that will entwine everyone in a cozy embrace.
By the end of this article, you will not only know how to make these scrumptious pumpkin cake balls but also have the creativity to make them uniquely yours!
Ingredients You’ll Need
To make these pumpkin cake balls, you’ll need the following ingredients:
– **1 can (15 oz) pumpkin puree**
Pumpkin puree is your star ingredient, imparting moisture, flavor, and that vibrant orange hue. Ensure you’re using pure pumpkin puree, not pumpkin pie filling, which contains added spices and sugars.
– **1 box yellow cake mix (or spice cake mix)**
The cake mix serves as the foundation of your cake balls. You can use a yellow cake mix for a general cake base or a spice cake mix to enhance those warm fall flavors even more.
– **1 teaspoon pumpkin pie spice**
This blend of spices (cinnamon, nutmeg, and ginger) enhances the pumpkin flavor. If you don’t have pumpkin pie spice, you can substitute it with an equal mix of cinnamon and nutmeg.
– **1/2 cup cream cheese frosting**
Frosting helps to bind the cake crumbs together without drying them out. You can use store-bought or homemade cream cheese frosting depending on your preference.
– **12 oz chocolate chips (white, milk, or dark)**
Coating your cake balls in melted chocolate adds sweetness and creates a beautiful, glossy finish. The chocolate choice can reflect your taste: white chocolate for a sweeter note, or dark chocolate for a richer finish.
– **Sprinkles or chopped nuts (optional)**
For decoration, feel free to roll your coated cake balls in sprinkles or chopped nuts like pecans or walnuts for extra texture and color.
Each of these ingredients plays a significant role in bringing the flavors and textures of your pumpkin cake balls to life!
How to Make Pumpkin Cake Balls
Now that you have all your ingredients laid out, let’s dive into the step-by-step process of making pumpkin cake balls:
1. **Preheat Your Oven**: Set your oven to 350°F (175°C). This allows the oven to be at the right temperature to bake your cake evenly.
2. **Prepare Your Baking Pan**: Grease or line a 9×13 inch baking pan with parchment paper. This will ensure the cake releases easily after baking and prevent it from sticking to the pan.
3. **Mix Cake Batter**: In a large bowl, combine the cake mix and pumpkin puree. Add in the pumpkin pie spice and mix until well combined. The batter may seem thick; this is normal due to the pumpkin. Stir until no dry spots remain, and the batter is smooth.
4. **Bake the Cake**: Pour the batter into the prepared baking pan and spread it evenly. Bake in the preheated oven for 25 minutes or until a toothpick inserted into the center comes out clean. If using a dark pan, keep an eye on the baking time as it might bake faster.
5. **Cool the Cake**: Once baked, remove the pan from the oven and let it cool completely in the pan on a wire rack. This step is crucial to prevent melting the chocolate later on when you’re coating the cake balls.
6. **Crumble the Cake**: After cooling, crumble the cake into a large bowl. You can do this with your hands or a fork, breaking it into small pieces. The goal is to get an even mix without large chunks.
7. **Incorporate Frosting**: Add the cream cheese frosting to the crumbled cake and mix thoroughly. This will create a moist mixture that you can shape into balls. The amount of frosting can be adjusted based on how moist you desire the mixture to be.
8. **Shape the Cake Balls**: Take a small amount of the mixture in your hands and roll it into 1-inch balls. Place them on a baking sheet lined with parchment paper. If the mixture is too sticky, consider refrigerating it for about 15-30 minutes to make shaping easier.
9. **Chill the Cake Balls**: Once all the balls are shaped, place the baking sheet in the refrigerator for about 30 minutes. Chilling helps the balls hold their shape when coating them in chocolate.
10. **Melt the Chocolate**: In a microwave-safe bowl, melt the chocolate chips in 30-second increments, stirring in between, until smooth and completely melted. Alternatively, you can melt the chocolate using a double boiler on the stove.
11. **Coat the Cake Balls**: Using a fork or a toothpick, dip each cake ball into the melted chocolate, allowing excess chocolate to drip off. Return the coated cake ball to the baking sheet.
12. **Decorate**: If you’re using sprinkles or chopped nuts, quickly add them on top of the chocolate coating before it sets. This will help them adhere better.
13. **Set the Coating**: Allow the chocolate coating to harden at room temperature or place the baking sheet back in the refrigerator for faster setting.
14. **Serve and Enjoy**: Once the chocolate is set, your pumpkin cake balls are ready to be enjoyed! You can store them in an airtight container in the fridge for up to a week.
4 Variations & Substitutions
Creating variations of pumpkin cake balls is a fun way to experiment and personalize your recipe. Here are some ideas to inspire you:
1. Gluten-Free Pumpkin Cake Balls
You can easily make these delightful treats gluten-free by using a gluten-free cake mix. You might also opt to use almond flour combined with a gluten-free binder. Just ensure all additional ingredients (like chocolate and frosting) are also gluten-free. The texture will still be moist and delectable!
2. Vegan Pumpkin Cake Balls
To make your cake balls vegan-friendly, replace the following ingredients: use a dairy-free cake mix, substitute the cream cheese frosting with a vegan version (or make your own using coconut cream), and choose dairy-free chocolate chips. The resulting treat will still pack the same fall flavors without any animal products.
3. Spiced Pumpkin Cake Balls
If you adore spices, add a teaspoon or two of *chai spice* or extra cinnamon to your cake mix for a more aromatic touch. You can also stir in some mini chocolate chips or nuts to the dough to add texture inside the cake balls, enhancing both flavor and chewiness.
4. Pumpkin Cheesecake Cake Balls
To elevate the flavor profile, blend pumpkin puree with a melted cream cheese mixture instead of frosting for a creamier texture. This variation will give a cheesecake twist to the cake balls and make them extra indulgent!
Common Mistakes to Avoid
Creating fabulous pumpkin cake balls might seem straightforward, but there are several common mistakes that can pop up. Avoid these pitfalls to ensure your cake balls are a success:
1. **Not Cooling the Cake**: If you skip the cooling step after baking, the cake will be too hot to crumble properly, resulting in a sticky mess when trying to shape the cake balls.
2. **Using Pumpkin Pie Filling**: Always use pure *pumpkin puree* for this recipe, not pumpkin pie filling, which contains sugar and spices. This might throw off the balance of flavors in your cake balls.
3. **Skipping the Chilling Step**: Chilling the cake balls before coating in chocolate is crucial. It helps them hold their shape and prevents the chocolate from melting or sagging.
4. **Using the Wrong Chocolate**: Choosing the right kind of chocolate is essential. Some chocolate chips don’t melt smoothly and may not adhere well to the cake balls. Opt for high-quality chocolate chips that are specifically meant for melting.
5. **Overmixing Frosting**: When combining the cake crumbs and frosting, overmixing can lead to a dense texture, making it challenging to roll into balls. Mix only until combined for a lighter cake ball.
Storage, Freezing & Reheating Tips
Storing your pumpkin cake balls properly is vital to maintain their freshness and flavor:
– **Storage**: Keep any leftover cake balls in an airtight container in the refrigerator for up to a week. They can also be left out at room temperature for a couple of days, but refrigeration helps preserve their taste and texture.
– **Freezing**: To freeze, allow the cake balls to set completely after coating them in chocolate. Then, place them in a single layer on a baking sheet and freeze until solid. Transfer the frozen cake balls to a freezer-safe container or a zip-top bag and store for up to three months.
– **Thawing**: When ready to enjoy, remove the desired amount from the freezer and allow them to thaw in the refrigerator for a few hours or at room temperature for about 30 minutes before serving.
– **Reheating**: While cake balls are best enjoyed cold or at room temperature, avoid reheating them in the microwave, as that can cause the chocolate to lose its sheen. They’re delightful as-is straight from the fridge!
Frequently Asked Questions
**1. Can I substitute homemade pumpkin puree for canned?**
Yes, you can use homemade pumpkin puree if you have it available. Make sure to cook the pumpkin until tender, blend it until smooth, and drain excess moisture. The consistency should be similar to canned puree to avoid disrupting the cake ball texture.
**2. How can I make these cake balls less sweet?**
If you’re looking to cut down on sweetness, consider reducing the amount of frosting used or opting for a less sweet chocolate coating. You can also replace some of the frosting with Greek yogurt for a creamier, slightly tangy flavor.
**3. What if my cake balls are too soft?**
If your cake ball mixture ends up too soft for shaping, try chilling the mixture for a longer time before working with it. If that doesn’t help, add a little more cake mix or powdered sugar progressively until you achieve the right consistency.
**4. Can I use white chocolate instead of dark for coating?**
Of course! White chocolate offers a sweeter profile that complements the pumpkin spice perfectly. Just be aware that it may not provide the same depth of flavor that dark chocolate would.
**5. How do I know when the chocolate coating is set?**
You’ll know the chocolate coating is set when it feels firm to the touch and no longer sticky. If using tempered chocolate, the texture will be glossy. Allow at least 30 minutes room temperature cooling or 15 minutes in the fridge for proper setup.
Conclusion
These easy pumpkin cake balls are the epitome of fall delights, capturing the warm and inviting flavors of the season. Easy to prepare, versatile, and visually stunning, they’re sure to become a hit at your next autumn gathering. Feel free to experiment and make them your own, whether you’re accommodating dietary needs or simply adding your twist.
Now that you have all the guidance and knowledge, it’s time to gather your ingredients, channel those autumn vibes, and create these scrumptious bites of joy. Don’t forget to share them with family and friends; after all, homemade treats are best enjoyed together. Happy baking!
[Read also: Easy Dessert Recipes for Beginners]


