**Prep time: 30 minutes
Cook time: 45 minutes
Total time: 1 hour 15 minutes
Servings: 12 brownies**
If you’re looking for a decadent dessert that combines the richness of *creme brulee* with the lusciousness of *red velvet* brownies, you’ve landed in the right place! Welcome to the world of *Red Velvet Creme Brulee Brownies*, a treat that will impress at any gathering and satisfy your sweet tooth. These dreamy, creamy brownies feature a stunning ruby-red hue, a soft and fudgy texture, and a crispy, caramelized topping that will make your heart skip a beat.
This recipe holds a special place in my heart; it reminds me of countless baking sessions in my cozy kitchen, where the sweet aroma and warm feelings take over. I’m excited to share this delightful creation with you, guiding you through each step, ingredient, and detailed tip to make sure your brownies turn out perfect every time.
What you’ll learn in this article is not just how to make these spectacular brownies, but also a bit about the magic behind them, the ingredients used, some creative variations, and even answers to your frequently asked questions. Let’s dive into the deliciousness of *Red Velvet Creme Brulee Brownies*!
What Are Red Velvet Creme Brulee Brownies?
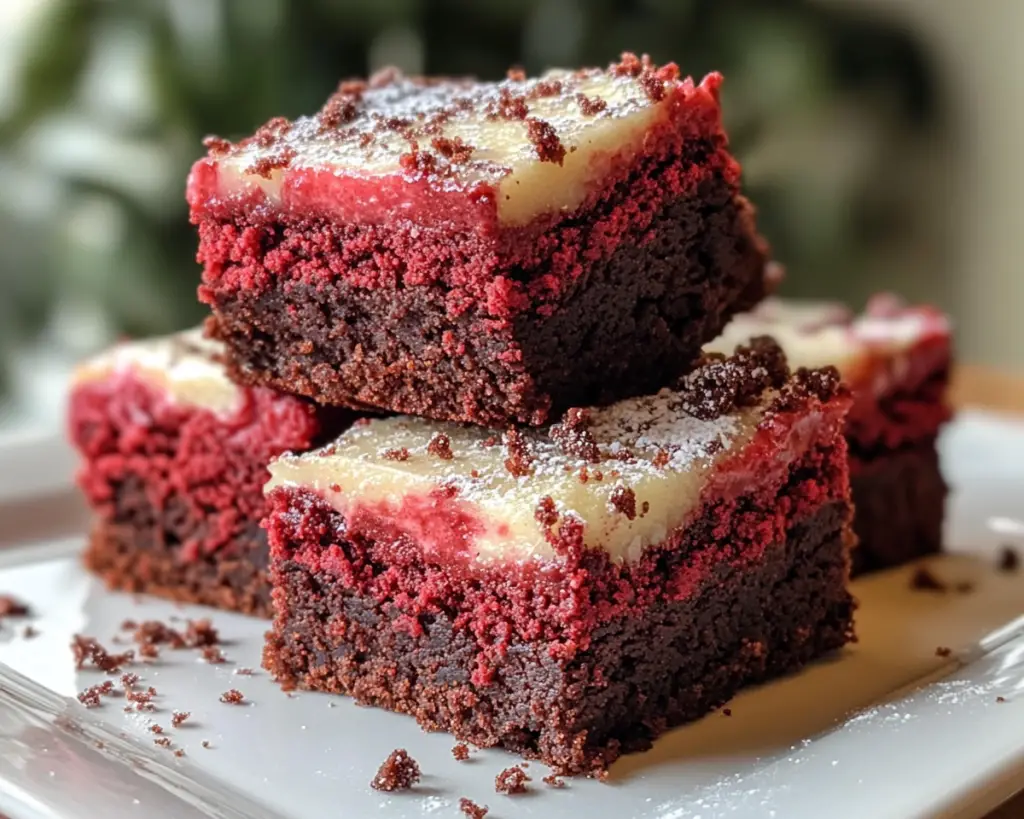
*Red Velvet Creme Brulee Brownies* are an exquisite fusion of traditional red velvet cake and the creamy, indulgent nature of french *creme brulee*. Originating from the southern United States, *red velvet* cake is renowned for its striking red color, soft texture, and a hint of cocoa powder that gives it a unique flavor. The addition of *creme brulee* — a creamy dessert consisting of a rich custard topped with a hard layer of caramelized sugar — elevates the brownie experience to an entirely new level.
In essence, these brownies consist of a rich red velvet brownie base topped with a smooth and luscious *creme brulee* layer. The contrast between the fudgy chocolatey bottom and the creamy, caramelized layer offers incredible texture and taste. The flavor profile is a beautiful blend of chocolate, vanilla, and a hint of tanginess from the vinegar typically found in red velvet recipes. The bright red color also makes these brownies a stunning centerpiece for events, from Valentine’s Day to holiday parties.
Whether you are a novice baker or an experienced one, these brownies are simple enough to make yet impressive enough to serve at gatherings. The flavors and textures truly combine in a way that delivers a little bit of everything we love in desserts — chocolate, creaminess, and that satisfying crunch when you break the caramelized top layer.
Why You’ll Love This Red Velvet Creme Brulee Brownies
One of the standout benefits of making *Red Velvet Creme Brulee Brownies* is their irresistible taste. They are incredibly rich, buttery, and melt-in-your-mouth delicious, making them a memorable treat for both friends and family. The unique combination of *red velvet* and *creme brulee* appeals to a wide range of taste buds, making these brownies exceptional for any occasion.
The preparation isn’t overly complicated, which is a significant plus for busy parents or anyone just beginning their baking journey. You’ll find that while the recipe has a few components, each part is straightforward, and the end result is undoubtedly impressive.
Additionally, these brownies offer versatility. You can serve them warm with a scoop of vanilla ice cream on the side, or simply enjoy them as they are. They can be made for special occasions or just because you are craving something sweet. The *creme brulee* layer adds an element of elegance that makes them stand out from your typical brownie.
Moreover, let’s not forget about cost — most of the ingredients are pantry staples, which means you can whip these up without a hefty grocery bill. And who wouldn’t love a dessert that looks fancy but is budget-friendly?
Ingredients You’ll Need
To create these delicious brownies, gather the following ingredients:
– **For the Red Velvet Brownie Base:**
– 1 cup unsalted butter (for richness and moisture)
– 2 cups granulated sugar (adds sweetness and helps create the brownie texture)
– 4 large eggs (provide structure and moisture)
– 2 teaspoons vanilla extract (for flavor)
– 2 ½ cups all-purpose flour (the main structure)
– ½ cup unsweetened cocoa powder (adds depth and chocolate flavor)
– 1 teaspoon baking powder (helps the brownies rise)
– 1 teaspoon salt (enhances all the flavors)
– 1 tablespoon red food coloring (for that vibrant red hue)
– 1 teaspoon white vinegar (adds tang and helps with color)
– **For the Creme Brulee Layer:**
– 1 ½ cups heavy cream (for creaminess and richness)
– 4 large egg yolks (for thickness and smooth texture)
– ½ cup granulated sugar (sweetens the custard)
– 1 tablespoon vanilla extract (adds warmth and flavor)
– Additional granulated sugar for caramelizing (for that classic *creme brulee* topping)
Each ingredient plays a crucial role in the final product. Be sure to use *unsalted butter* for accuracy in flavor, and consider using pasteurized eggs for safety. If you want to experiment, you can also try alternative sweeteners or even natural food colorings made from beet juice for a more organic approach to coloring your brownies.
How to Make Red Velvet Creme Brulee Brownies
Follow these step-by-step instructions for creating your own *Red Velvet Creme Brulee Brownies*:
1. **Preheat Your Oven**: Start by preheating the oven to 350°F (175°C) and line a 9×13-inch baking dish with parchment paper. This will prevent the brownies from sticking and make it easier to remove them later.
2. **Prepare the Brownie Base**: Melt the *unsalted butter* in a medium saucepan over low heat. Once melted, remove from heat and whisk in the *granulated sugar* until combined. Allow it to cool slightly before adding in the *eggs*, one at a time, mixing thoroughly after each addition. Add *vanilla extract* and stir until just combined.
3. **Combine Dry Ingredients**: In a separate bowl, combine the *all-purpose flour*, *unsweetened cocoa powder*, *baking powder*, and *salt*. Whisk until evenly mixed. This will ensure that all the dry ingredients are properly distributed throughout the brownie mixture.
4. **Mix the Batter**: Gradually add the dry ingredients to the wet mixture, mixing gently until no flour pockets remain. Be careful not to overmix, as this can lead to tough brownies. Lastly, add the *red food coloring* and *white vinegar*, stirring until the color is uniform.
5. **Pour into Baking Dish**: Pour the brownie batter into the prepared baking dish. Using a spatula, spread the batter evenly, ensuring corners are filled well to avoid uneven baking.
6. **Bake the Brownies**: Bake in preheated oven for 25-30 minutes, or until a toothpick inserted into the center comes out with a few moist crumbs (but not wet batter). The edges should begin to pull away slightly from the sides of the pan.
7. **Prepare the Creme Brulee Layer**: While the brownies are cooling slightly, prepare the *creme brulee* layer. In a saucepan, heat the *heavy cream* over medium heat until it’s steaming, but do not bring it to a boil.
8. **Whisk Egg Yolks and Sugar**: In a mixing bowl, whisk together the *egg yolks* and *granulated sugar* until pale and fluffy. Gradually pour in the hot cream while whisking continuously to temper the eggs and prevent them from scrambling.
9. **Add Vanilla Extract**: Once combined, stir in the *vanilla extract* and ensure the mixture is smooth.
10. **Pour Over Brownies**: Slowly pour the *creme brulee* custard over the baked brownie layer, ensuring even coverage. The custard should smoothly coat the brownie base without mixing together too much.
11. **Bake Again**: Return to the oven and bake for an additional 20-25 minutes, or until the custard is set but still jiggles slightly in the center when gently shaken.
12. **Chill and Caramelize**: Once baked, allow the entire dish to cool to room temperature. Place it in the refrigerator for at least 2-3 hours (or overnight) to fully set. When you are ready to serve, sprinkle a thin layer of *granulated sugar* over the creme brulee layer and then caramelize using a kitchen torch until golden brown and crispy. Alternatively, broil in the oven for a few minutes, watching closely to avoid burning.
13. **Serve**: Cut the chilled brownies into squares or rectangles and serve. The combination of fudgy brownie and creamy topping is sure to captivate all who taste them!
5 Variations & Substitutions
The beauty of *Red Velvet Creme Brulee Brownies* is their versatility. Here are some fun variations and substitutions:
1. **Nutty Addition**: Add 1 cup of chopped walnuts or pecans into the red velvet brownie batter before baking. The nuts will not only add a delightful crunch but will also introduce a lovely nutty flavor that complements the chocolate undertones beautifully.
2. **Peppermint Twist**: To create a refreshing take, incorporate 1//2 teaspoon of peppermint extract into the cream layer for a peppermint-infused *creme brulee*. This version is especially delightful during the holiday season and will surely impress guests.
3. **Gluten-Free Option**: Substitute the all-purpose flour with a 1:1 gluten-free baking flour blend. Ensure other ingredients (like baking powder) are also gluten-free to maintain integrity and flavor. The brownies will maintain their moist texture while meeting dietary restrictions.
4. **Vegan Brownies**: To make *vegan Red Velvet Creme Brulee Brownies*, use flax or chia seeds soaked in water to replace eggs (1 tablespoon per egg). Substitute cream with coconut cream or a plant-based cream alternative. Adjust your sweeteners as necessary to ensure a balanced flavor.
5. **Mocha Variation**: Enhance the chocolate flavor by adding 2 tablespoons of brewed espresso into the brownie batter. This addition brings depth to the chocolate flavor, making the brownies even more addictive!
Common Mistakes to Avoid
Baking is both a science and an art. Understanding the common mistakes can help you create the perfect *Red Velvet Creme Brulee Brownies* every time:
– **Overmixing the Batter**: It’s easy to overmix the batter when combining wet and dry ingredients. This can lead to tough brownies. Stir just until combined, and it’ll ensure a soft, fudgy texture.
– **Baking Time**: Every oven is different! Using the toothpick test, ensure that you don’t overbake. The teeth should have a few moist crumbs, indicating that the brownies are perfectly cooked without drying out.
– **Not Chilling Enough**: It’s imperative to chill the *creme brulee* brownies completely after baking. This allows the *creme brulee* layer to set properly, giving you that creamy texture you crave. Rushing this step might lead to a runny topping.
– **Not Caramelizing Evenly**: When caramelizing the top, make sure the sugar is evenly sprinkled for an even melt. If the sugar mound is too thick, it might not caramelize perfectly, resulting in a chewy texture rather than a crispy topping.
– **Using Low-Quality Chocolate or Cream**: The quality of your ingredients matters. Using high-quality unsweetened cocoa powder and heavy cream significantly elevates the flavor, making your brownies pleasantly decadent.
Storage, Freezing & Reheating Tips
Storing your *Red Velvet Creme Brulee Brownies* properly will ensure they last for days while maintaining their delicious flavors:
– **Storage**: Keep the brownies covered in an airtight container in the refrigerator for up to a week. Ensure the caramelized top is intact, as it will lose its crispiness if stored uncovered.
– **Freezing**: To freeze, store brownies individually wrapped in plastic wrap, then place them in a freezer-safe container. You can freeze them for up to three months. Note that the *creme brulee* topping won’t hold its texture once frozen and caramelized; therefore, it’s recommended to freeze the brownie base separately.
– **Reheating**: If you want to enjoy the brownies warm, you can microwave them for about 10–15 seconds. Just be cautious not to overheat, as it can melt the *creme brulee* layer too much. If the topping is intact, you can re-crunch it with a quick hit from a kitchen torch after warming.
Frequently Asked Questions
**1. Can I make these brownies in advance?**
Absolutely! These brownies are perfect for making ahead of time. You can bake the brownie base and *creme brulee* layer and store them in the refrigerator for up to a week before serving. Just re-crunch the topping before serving for a delightful fresh finish.
**2. Can I reduce the amount of sugar?**
Yes, you can slightly reduce the sugar in the brownie base if you prefer less sweetness; however, keep in mind that the balance is crucial for the right texture. The sweetness helps the texture remain soft. It’s essential to find a balance that suits your preferences.
**3. Why did my custard layer not set properly?**
If your *creme brulee* layer didn’t set, it might be due to insufficient baking time or incorrect temperature. Make sure that the custard is set and resembles the texture of gel before removing it from the oven. Always trust your oven thermometer as it might run hotter or colder than the set temperature.
**4. Can I top these brownies with anything else besides sugar?**
Certainly! While the classic *creme brulee* topping is luscious on its own, feel free to drizzle these brownies with chocolate ganache or even a spiced caramel sauce for an extra layer of flavor. Chopped nuts or sprinkles can add visual appeal too!
**5. Can I use red velvet cake mix as a shortcut?**
Yes, if you prefer convenience, using a red velvet cake mix can be an easy alternative. Just prepare the mix according to package instructions and layer with the *creme brulee*. Although it may alter the brownies’ texture slightly, it’s still a valid shortcut on busy days.
In conclusion, these *Red Velvet Creme Brulee Brownies* offer not just a dessert experience but a delightful culinary adventure that brings joy to both the baker and the eater. With the rich chocolatey flavors and creamy textures, this recipe is sure to become a treasured dish in your repertoire.
So, gather your ingredients, roll up your sleeves and embark on this delicious creation! Be sure to customize it to your liking, share with family and friends, and delight in the praises that are sure to follow. Happy baking!
[Read also: Easy Dessert Recipes for Beginners]


