Prep time: 30 minutes
Cook time: 10 minutes
Total time: 40 minutes
Servings: 20 wrappers
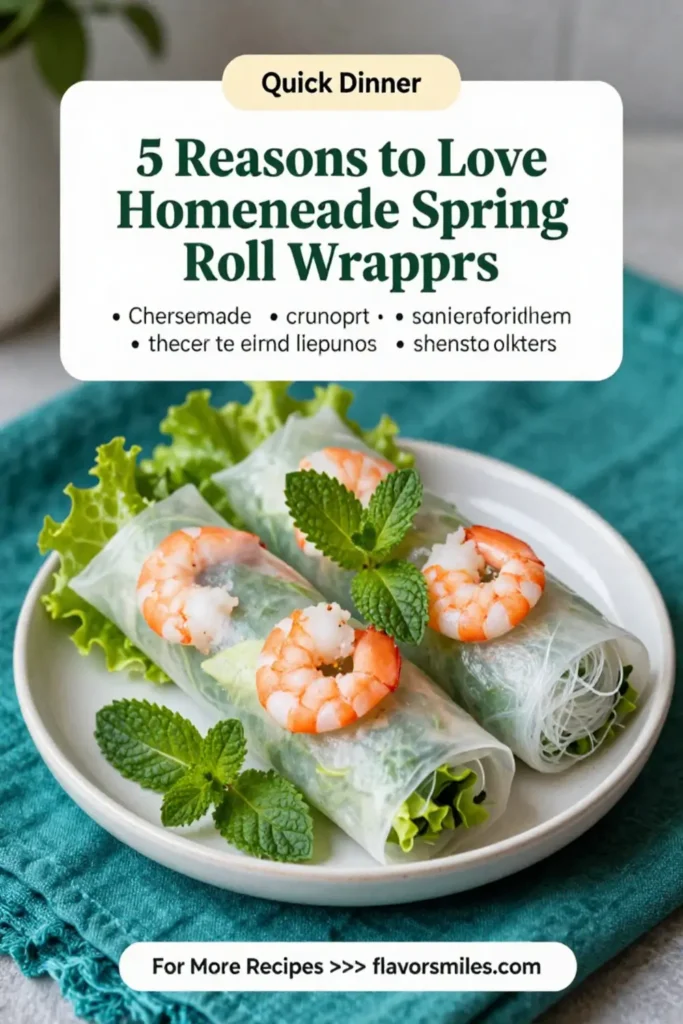
Making your own spring roll wrappers can be one of the most rewarding experiences in the kitchen. Not only does it give you control over the ingredients, but it also elevates your dishes with a personal touch. Below, discover five compelling reasons to love homemade spring roll wrappers along with a comprehensive guide on how to make them.
What Is 5 Reasons to Love Homemade Spring Roll Wrappers?
Homemade spring roll wrappers are thin sheets made typically from flour or rice flour and water, crafted to envelop a variety of fillings. The process of creating these wrappers allows for flexibility in flavor, texture, and thickness, tailored to suit your culinary preferences.
Why You’ll Love This
Understanding the benefits of homemade spring roll wrappers can enhance your culinary experience. Here are five key reasons to love making them at home:
1. **Quality Control**: You know exactly what goes into them. No preservatives or artificial ingredients!
2. **Customizable**: You can modify the flavors by adding herbs or spices. Try adding a pinch of salt to enhance the taste.
3. **Cost-Effective**: Homemade wrappers can save you money, especially if you’re a frequent cook.
4. **Freshness**: Nothing beats the taste of freshly made wrappers. They have a chewy texture and subtle nutty flavor that store-bought ones often lack.
5. **Creative Fun**: Making wrappers can be a fun and engaging activity for families or cooking parties.
Ingredients You’ll Need
To get started, gather these ingredients:
- 2 cups all-purpose flour – Provides the base for the wrappers.
- 1 teaspoon salt – Enhances flavor.
- ¾ cup warm water – Helps to bind the flour into a workable dough.
- 1 tablespoon vegetable oil – Ensures flexibility and prevents sticking.
![Drawing showing the ingredients needed for homemade spring roll wrappers.]
How to Make
Follow these steps to create your own homemade spring roll wrappers:
- Mix the Dry Ingredients – In a large mixing bowl, combine the flour and salt. Whisk thoroughly to ensure even distribution of salt throughout the flour.
- Add Water Gradually – Slowly pour in the warm water while stirring the mixture with your other hand. This helps to incorporate the water without making any mess.
- Knead the Dough – Once combined, proceed to knead the dough on a lightly floured surface. Knead for about 10 minutes until smooth and elastic. This step is crucial for the texture of your wrappers.
- Rest the Dough – Cover the dough with a damp cloth or plastic wrap and let it rest for at least 20 minutes. This resting period allows the gluten to relax, making it easier to roll out.
- Roll Out the Wrappers – Divide the dough into small balls (about the size of a golf ball). Use a rolling pin to flatten each ball into a thin circle. Aim for a thickness of about 1/16 inch.
- Cook the Wrappers – Heat a non-stick skillet over medium heat. Cook each wrapper for about 30 seconds on each side until slightly opaque but not brown. Stack them on a plate, separating each with parchment paper to prevent sticking.
Variations & Substitutions
Rice Flour Variation: If you’re looking for a gluten-free option, substitute all-purpose flour with rice flour in equal measure. This change will yield a lighter, more delicate wrapper, perfect for fresh spring rolls.
Herbed Wrappers: Enhance your spring rolls by incorporating fresh or dried herbs into the dough. Simply add finely chopped cilantro or basil during the mixing stage. This addition gives your wrappers a delightful aroma and flavor.
Turmeric-Infused Wrappers: For a vibrant hue, add a teaspoon of turmeric powder to your dough mixture. This not only boosts the visual appeal but also adds a subtle earthy flavor to your wrappers.
Whole Wheat Variation: For a healthier alternative, use whole wheat flour instead of all-purpose flour. You’ll enjoy a nuttier flavor and a boost in fiber content, making your spring rolls even more nutritious.
Spicy Wrappers: To add a kick to your wrappers, incorporate red chili flakes into the flour. This variation will impart a subtle heat, perfect for those who enjoy a little spice in their dishes.
Common Mistakes to Avoid
When making spring roll wrappers, it’s easy to encounter challenges. Recognizing these pitfalls can help improve your skills:
Overflouring: It’s tempting to add extra flour to prevent sticking. However, this can lead to tough wrappers. Only use enough flour to form a workable dough, and use parchment paper to separate them during the cooling process.
Insufficient Resting Time: Skipping the resting period can result in elastic, hard-to-roll dough. Ensure you allow at least 20 minutes for the dough to rest. This step is essential for smooth rolling.
Cooking Temperature Too High: Cooking the wrappers at too high a temperature can burn them. Aim for medium heat; watch closely to avoid overcooking the wrappers, which should remain pliable and soft.
Storage, Freezing & Reheating Tips
Once your wrappers are made, proper storage is crucial:
– **Refrigeration**: Store unused wrappers in an airtight container in the fridge for up to five days. Layer them with parchment paper to avoid sticking.
– **Freezing**: For long-term storage, freeze the wrappers. Place them in a zip-top bag with parchment paper between each one. They’ll last up to three months in the freezer.
– **Reheating**: When ready to use, thaw frozen wrappers in the refrigerator overnight. To reheat, steam or place them in a skillet for a few seconds to restore their pliability.
This method ensures that your wrappers remain fresh, flavorful, and ready for use every time you need them.
Frequently Asked Questions
Can I use whole wheat flour instead of all-purpose flour?
Yes! Whole wheat flour is a great alternative and can offer more fiber and a nuttier flavor. Just be aware that it may alter the texture a bit. The wrappers will be slightly denser than those made with all-purpose flour.
How do I know when the wrappers are fully cooked?
The wrappers will become slightly opaque with a glossy appearance. They should still be pliable and flexible. Avoid any browning, as this indicates they have cooked too long.
What can I fill my spring rolls with?
The beauty of homemade wrappers is that you can fill them with virtually anything! Popular options include fresh vegetables, shrimp, or shredded chicken. You can also create vegetarian options with tofu and a variety of veggies.
How do I prevent my wrappers from sticking together?
To prevent sticking, layer parchment paper between each wrapper as you cook them. Additionally, ensure they cool completely before stacking them in an airtight container.
Can I make the dough ahead of time?
Certainly! You can prepare the dough and refrigerate it for up to 24 hours before using it. Just ensure to cover it tightly to prevent it from drying out.
Conclusion: Homemade spring roll wrappers are not just a delicious addition to your meals; they also allow you to personalize your culinary creations while enjoying the process. The next time you’re in the kitchen, give these wrappers a try — you might find they become a new favorite!